Showing posts with label Yeast Breads. Show all posts

Sunday, September 30, 2012

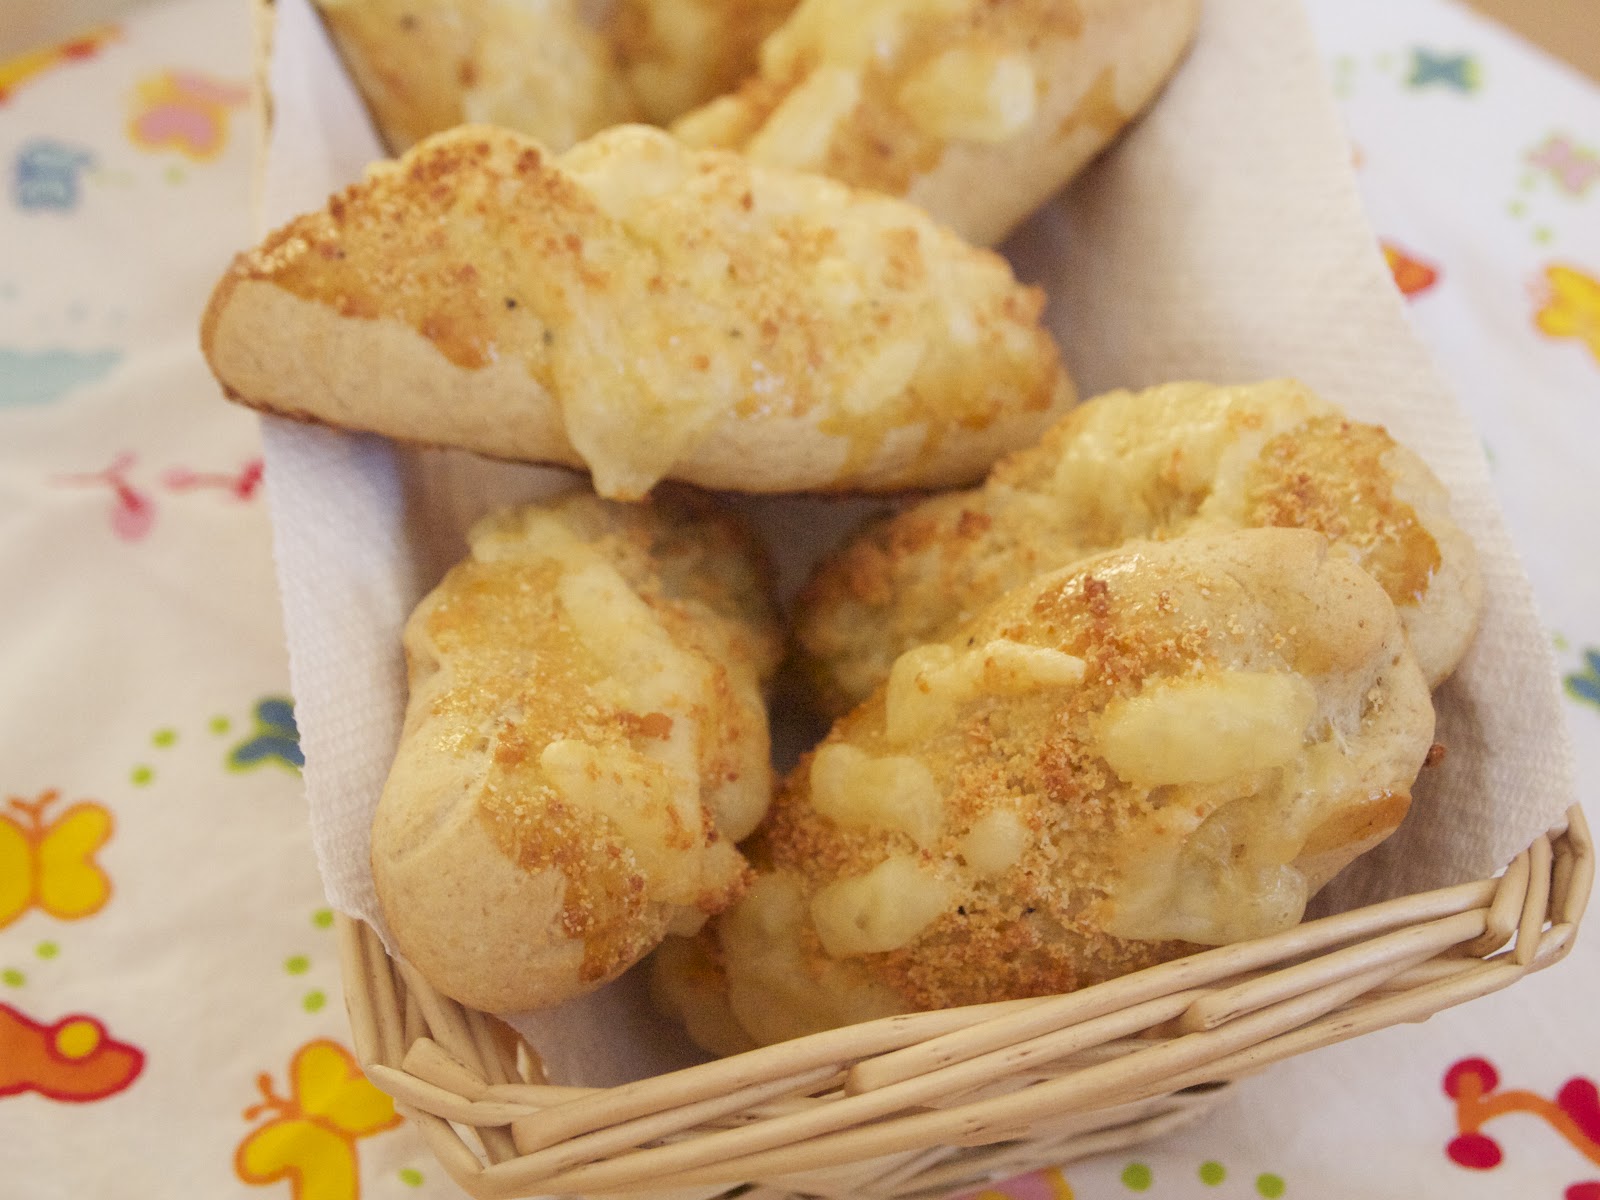
Cheese Rolls

Long time no see tang-zhong! The last time I used the water-roux method to make bread was back in April. I can't believe it is already autumn. Ever since my last post on chocolate layered bread, I've made bagel, pretzel, brioche, and Chinese bun (man-tou). What a nice little crumb path....

This weekend I am sharing cheese rolls, adapted from Rasa Malaysia's Cheese Breadsticks. I omitted milk powder and used a combination of grated parmesan cheese and Swiss cheese.

 
Cheese Rolls
Adapted from Rasa Malaysi'a Cheese Breadsticks

65g lukewarm water
2 teaspoon active dry yeast
1 egg
75g tang-zhong
30g sugar
1 teaspoon salt
195g whole wheat flour
90g all purpose flour
3 tablespoon unsalted butter, softened
1 egg yolk
grated or sliced cheese of your choice

Sprinkle yeast in water and let stand for 5 minutes or until foamy. In another bowl, mix together the egg and tang-zhong. In a large bowl, mix together the flour, sugar and salt. When yeast is activated, pour yeast into egg mixture. Pour all the wet ingredients into the large bowl. Use a spatula to incorporate the wet and dry ingredient together.

Sprinkle some hand flour on the work station and take rough dough out of the bowl. Flatten the dough and add butter. Knead butter into dough, add a little flour at a time to draw in the butter. Continue kneading the dough with the heel of your hand till the dough feels smooth and stretchy under your hand. Snap a small piece of dough off, flatten with your palms, and stretch it out to see if you can form a thin membrane without tearing the dough. If dough isn't stretchy or it tears into uneven circle, knead the tiny dough back into the larger dough and knead for another five minute. Check the dough again to see if you've reached the desired consistency.

In an oiled bowl, roll the dough around the oil and let sit in room temperature covered with plastic wrap for 40 minutes or until double the size. Alternatively, place dough in the fridge and let proof for 4 hours.

Sprinkle flour on the work station and remove the dough from the bowl. Gently press on the dough to release air bubbles. Let sit on the station for 10 minutes.

Divide dough into 60g pieces. Pat each dough into a rough circle and tuck the sides back in to make a ball. Continue with the rest of the doughs. Roll each ball into a 6 inch long roll. Place rolls 2 inch apart on a baking sheet. Place plastic wrap over the baking sheet and let the rolls proof for second time until they double in size.

Preheat the oven to 350F right after you cover the baking sheets in plastic wrap. Right before baking, break an egg yolk and add 2 teaspoon water and a little salt. Brush egg wash over the rolls, be careful not to let the egg wash drip down to the bottom of the roll. Egg wash can glue the bread down, preventing it from rising properly in the oven. Sprinkle cheese over the egg wash. Bake for 14 minutes. Let cool on a rack before storing it in an airtight container.


Sunday, July 22, 2012

Brioche is a Rich Indulgence

About a year ago, I went on a scavenger hunt for brioche because I wanted to replicate Fred 62's brioche French toast. Even though French toasts are made from stale bread, the ones at the diner absorbed so much cream beforehand that beneath the crusted skin was a moist toast. I tried looking for brioche at artisan bread shops, even visiting Whole Foods and farmers market, but it was so frustrating that none of the places I visited sold brioche. At last I resorted to a tang zhong milk bread from Yamashiro at Little Tokyo. Although I had a great breakfast, I'm still hoping to make French toast from brioche one day.

First take on brioche at Anne's
I don't recall ever seeing brioche at bread shops, although I've had some at Little Next Door for brunch. A simply rich chocolate chip brioche with a dark cup of latte made my weekend so much merrier. I love how brioche has butter coats your tongue into silk and makes every bite of bread melt in your mouth like a piece of chocolate. There's nothing more delicate than brioche...

I am very blessed to learn to make brioche bread last week from Anne Willan. This is the best summer job anyone can ask for--surrounded by food and antique cook books. If it wasn't for the recipe testing, I would have never dared to make brioche. Brioche recipe is intimidating...with the extra amounts of butter and egg,the dough is simply too sticky and far too challenging for an amateur like me.


Nevertheless, I DID IT! It was a very exciting experience. I pretended that the dough I'm throwing against the counter is the fat spy who reported me to the police when I exceeded the 2 hour parking limit. That nasty woman deserves to be slapped on the counter on all sides! And for 10 minutes long!

What you need for your brioche dough is:
1 tablespoon active dry yeast
1/2 cup milk, lukewarm
330g all purpose flour
1 tablespoon sugar
1 teaspoon salt
2 eggs, beaten together

Later you'll need 4 tablespoons unsalted butter, 100g grated cheese of your preference, and more flour.

In a rather flat bowl, let yeast dissolve in milk for 5 minutes. Meanwhile, sift the flour onto workspace and sprinkle sugar and salt on top. Make a well in the center and pour egg mixture and milk into the well. With one hand mix the liquid together, then slowly add in flours.

When you get a sticky dough that's coming together, use a scrapper to cut through the dough and incorporate all the leftover flour. Gather the dough in one hand and throw it against the workspace with force. Then with the other hand repeat the same motion. Stop when the dough peels off like a rope, about 10 minutes. Pat dough into a ball.


Grease a large bowl with vegetable oil and coat the dough on all sides with oil. Lay a towel or plastic wrap on top then let dough rise for 1 hour or until double the size.

On a lightly floured surface, remove the dough from the bowl and gently knead the dough to let air escape. Place butter in center and fold over it with the dough. With your palms squeeze the dough and butter together. Butter might ooze out and the dough will reject the butter at first. Flour the surface again and knead dough for 1 minute. Gather dough and throw against counter for 2-3 minutes. Add grated cheese, reserving 2 tablespoons for topping. Knead cheese into dough for another 2-3 minutes.

Butter loaf pan. Pat the dough out into a square, 1" longer than your loaf pan. From the bottom, roll the dough away from you. Squeeze the gaps together then fold the sizes inward and squeeze the fold to seal. Insert fingers under dough and flip the dough over as you drop it into the loaf pan. Smooth the side and make sure all corners are covered by dough. Cover pan loosely with plastic wrap and let rise for a second time, 45 minutes to 1 hour.

Preheat oven to 400F. Make egg wash with one egg and 1/2 teaspoon water. When the loaf pan is almost filled, brush top with egg wash, leaving a quarter inch space on all sides of the dough, so the egg wash doesn't glue the bread down during the baking process. Sprinkle on the reserved cheese and bake for 25 minutes.


Monday, June 25, 2012

Oriental Bread--Man Tou

a man tou is broke down in the middle, and you can see the air holes in the bread

I'm packing away my kitchen this weekend. I can't wait for the day when I can buy a nest I call home and settle for good. But for now, all the spatula, measuring cups, and bowls will have to stay in their cardboard boxes for.

As I packed, I realized I can't update my blog if I leave all my stuff in storage while I crash in my friend's apartment for the time being. This put me in panic mode. Not only do I want to update my blog, I still want to cook and bake too! So I dashed to Google and tried to see what can I possibly learn to make without an oven. Well duh! There's tons of stuff I can make. I don't' know what I was worrying about.
Two white buns side by side

But anyways thanks to my small panic attack because I found a man-tou 饅頭 recipe that I've never thought of making. Man-tou or 饅頭 in Mandarin is a flavorless bun. It's what travelers bring with them on a long distance trip. It lasts a long time before drying up and it's loaded with carbs. Of course nowadays, people create green tea flavor, taro ones and even sweet potato man-tou. It's no longer the plain old bun that you eat when you've got nothing better to fill your empty stomach.

In no time, I got my active dry yeast soaked in warm milk while measuring out some flour and sugar. All the preparation took me about 10 minutes? When I checked on the yeast, no bubbles. Hmm...this never happened, but I'm sure the yeast will get to work once I put everything together. Not so fortunate. I had a very difficult time working with the dough. It was very elastic and the dough barely stretch out. Even after letting it rest for 20 minutes on the counter, it got slightly softer, but still too difficult to knead.

The next day I started all over again with new yeast and even got a better version of the recipe. It seems like the traditional way is to make two doughs--one old and one young, then mix the two together to get the right chewiness. Like the first day I saw no bubbles when I soak the yeast in warm water. But as I recall, I used a little more than 1 cup of water but only 1/2 teaspoon of yeast. Maybe the proportion of water is too much for the yeast to bubble up?

All I can say is. It worked, this time.
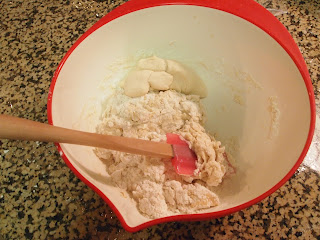
an old dough is to be kneaded into a bowl of flours
the dough on the top of the messy dough is the old dough
So what's the old and young dough I was talking about? Some Western bakeries keep a moldy little dough in their fridge, which is the key to their fragrant breads. Apparently in China, traditional man-tou makers also keep smelly doughs! Except theirs isn't moldy and they don't pass it on from generation to generation. The old dough is simply an over raised dough kept in a cold place for up to 3 months. Every time you want to make man-tou you snatch a chunk from the old dough and knead it into new flour. Whatever dough you don't use up, add it back to the old dough for next time you make man-tou. Similarly, the old dough gives man-tou a sour flavor, and it balances out with sugar to give you a light tang when you take a bite.

Another interesting thing about this recipe before I give you the recipe is that it uses cake flour! Yes, you heard me right, cake flour in bread! It gave me the right chew that I remember from childhood, when grandma used to walk a few kilometers to the market to buy me fresh buns before I drag my lazy ass off the bamboo mat.

You begin with a not so old old dough:
50g cake flour
150g all-purpose flour
1/2 teaspoon active dry yeast
110g warm water
a sprinkle of salt

let yeast soak in warm water for 10 minutes
a hand is kneading the dough; the force comes from the palm of the handmeasure out the flours in a large bowl and sprinkle some salt on top
pour water and yeast over flour
gather everything into a rough ball
start kneading with the back of your palm
push the dough away, then fold it back
turn the bowl a quarter to the right/left (whichever direction you prefer)
continue to knead, fold, and turn the bowl till you get a smooth surface
the bowl at this time should be free of flour and water
cover dough with wet clothe or plastic wrap and let rest for 3-4 hours
**you can also refrigerate the dough at this time and continue the next day

main dough:
150g all-purpose flour
200g cake flour
5g active dry yeast
200g milk
40g sugar
1/8 teaspoon baking soda
15g or 1 tablespoon unsalted butter, at room temperature
100g old dough

pour yeast into milk
measure out the dry ingredients into one large bowl
if butter is not at room temperature, heat it up for 5-10 seconds in the microwave
pour milk and yeast into the bowl of dry ingredients
when the ingredients are roughly incorporated, knead in the old dough
when you get a rough ball, add the butter
knead the butter into the dough, folding un-buttered sides onto the buttered side
knead with the back of your palm, fold over the dough, and turn the bowl a quarter to the right
continue until you get a very smooth surface and the dough is soft to push
take a small piece of dough and flatten it between your palms, then try to open it up between your fingers
a rolling pin and a scraper are on top of a thick dough roughcontinue kneading if the dough is too thick to stretch out; if you get a thin membrane then stop kneading
cover the dough with wet clothe or plastic wrap and let rest for 20 minutes
after twenty minutes, roll the dough out into a rectangle (length longer than width)
now we will roll the dough by first tugging the bottom up into a tight rope, then with your palms, roll the dough forward
you should get a long rope
if the rope isn't even in width, roll the dough back and forth stretching out
cut the rope up into 2" pieces
let pre-cooked man-tou rest for 40 minutes before steaming

When steaming, place a sheet of baking paper on top of the metal plate, then assemble the man-tou so that they have enough space between them to rise. Cook boiler on medium heat for 12 minutes. After steaming, turn off the fire and let the pot rest for 5 minutes before opening the lid to remove the man-tous.

three buns are placed in a rice cooker and they are not touching each other so their skin won't stick after steaming

A red electric rice cooker
I used TaTung Electric Cooker

Repeat with the remaining man-tou. They keep well in room temperature. You can reheat them with steam or in microwave. It's good for breakfast with a side of scramble egg!
scrambled egg with fish paste and onion inside a bun

Friday, June 1, 2012

Peter Reinhart's Bagel Recipe--My Last Batch of Homemade Bagels

Not everything is better homemade. Bagel, is an example. After trying out a one day bagel recipe, I went for Peter Reinhart's bagel recipe, which I read from Smitten Kitchen. The second recipe definitely taste better than the first because of the honey and additional time for flavor to develop. However, it's such a tedious process, and I still didn't find the NewYork flavor in my homemade bagel.

When my bagels first came out from the oven, it had a harder crust and a chewy body. Something is lacking here. Something flavorful. Maybe it's the water? I've heard how some bagel shops in LA boast that they import water from New York just for their bagels. Does it taste better?

Anyhow, the homemade bagels lost its crust the next morning. The interior lost its bouncy-ness. What replaced it was a leather shoe sole texture. Bummer. I took two days for those babies to marinate in the fridge, and they won't give me a longer shelf life. Since Ii is impossible for me to finish 10 bagels or a batch of bagels in one day, I'm calling an end to my bagel journey.

Bagels, you will be my lazy breakfast when I'm late for class. On second thought, I'm never going back to school, so scratch that! Bagels, you will be my craving till I visit New York again! Or when I take my lazy bum to Beverly Hills for one of those made-with-water-imported-from-NYC bagels.

a plain bagel slice in half and stuffed with cream cheese and smoked salmon
Homemade bagel with salmon and cream cheese
Even though I've had enough of bagel making (after two tries), you should still try them at home. Maybe you will like your homemade flavor more than the store-bought ones. Some bakeries may claim that they use the best ingredients, but you can't get that commercial taste out of your food from time to time. I believe in trying everything before giving up. If you never try, how would you know that it isn't for you?

First off get the recipe from Smitten Kitchen by clicking on the hyperlink provide above. The first thing the recipe calls for is a sponge. You mix your yeast with flour to get porous batter like below.

the dough has visible holes all over, very sticky, and gooey looking
bagel sponge
Then you add rest of the flour into the sponge and knead everything into a hard and stubborn dough. It will be more difficult to knead than a tang zhong dough. Even though the recipe said it will take you 15 minute to knead, it took me 40 minutes for the dough to pass the window-pane test. When you feel the dough is smooth on the outside, snitch a little piece off, press it down against the counter, then hold between your middle and index fingers in both hands, stretch the dough out. The dough is ready to shape once a thin layer of dough is visible when you stretch it out. If the dough rips before you see a thin film, then continue kneading till you get the right consistency.

Afterwards, divide the dough into 100g pieces. This will make small to medium sized bagels. For larger ones, similar to the size you find at coffee shops, divide dough into 120g pieces. Next roll each one into a ball. Press both of your thumbs into the middle of the dough, don't be too eager to poke a hole though it. Rotate the dough between your hands with your thumbs pressing lightly into the middle. This way you'll stretch the middle out evenly. When you feel like you got a shallow dip in the middle, poke a thumb through. Now put both of your thumbs into the hole and stretch it out while rotating the dough between your hands. It's easy to put your index finger through and spin the bagel to get a close to perfect circle in the middle.

bagels are shaped and laid out on a baking sheet while you shape the rest of the doughs
weight, roll, then shape
When you shaped all your bagels, cover them in light cloth or plastic wrap. Place the tray in fridge for up to two days.

When you're ready to bake them, preheat the oven and get a pot of boiling water. Next boil the bagel for one to two minutes on each side.

give the raw bagel a bath before baking it
fresh mini bagel from the oven

a light golden crust forms right out from the oven
I hope you enjoy your bagel journey!

Friday, May 18, 2012

Bready Bagel

I took a little break from blogging to celebrate my graduation. Three years of on and off studying and procrastination have come to an end with a walk up the stage and a hand shake with the dean. College is just a wonderful piece of chocolate chip cookie. You don't realize you've gobbled the whole thing up until  you see some lonely crumbs floating in your glass of milk. Flipping through my Facebook albums (I can't remember when was the last time I developed photos), I realized how little I've changed in appearance yet I'm a different person.

My greatest accomplishment in college is to embrace my love for baking, and most important of all motivating myself to start Chez Ma Cuisine. In a month I would be moving ma petite cuisine to start my post-graduation life!

To commemorate my college life I decided to make bagels. Plain, simple bagels that accompanied me through countless mornings. They are everywhere on campus. You can find them in the cafeteria, behind glass boxes at every cafe. I couldn't finish a whole bagel back then. Everything in America is so HUGE. Bagel back in Asia are the size of my palm. I felt wasteful throwing away the bottom half of my bagel. But the top half is absolute heaven when I toast them slightly and spread a thin layer of cream cheese. That reminds me of how frightened I was of cream cheese. What kind of devil's food has both cream and cheese in it!

A filling breakfast on the go

I don't remember when I finished my first whole bagel, but those American bagels aren't so big after all. If it weren't for the bagels on campus I probably would have starved in many many boring ass classes.

I googled for bagel recipes online, and picked Sophisticated Gourmet's New York-Style Bagel Recipe. It's a one-day bagel recipe, so it doesn't require you to make a sponge. You start off by dissolving the yeast in water, then kneading the dough together. For some reason, my dough wasn't sticky at all. After I let it rise in the oven for an hour, I couldn't form little balls. The dough just push away from each other.

The end result was tasty despite having to work with some stubborn dough. I'm definitely going to try the two-day method to see if I can correct the dough this time. Once again homemade taste so much better than store bought.

Bagel's interior texture

This recipe produces a good interior texture as store bought ones. What it lacks is a bit of chewiness. The outer shell is hard and the inside soft. I prefer my bagel to be more chewy. If you like bready bagels then definitely try this recipe at the link above.

Cream cheese and tayberry jam

Tuesday, April 17, 2012

Ugly Chocolate Bread

Soft and spongy chocolate layer bread
I saw these gorgeous chocolate breads on a Taiwanese blog. They remind me of a squared bread I loooooved as a child. In between the bread are layers of chocolate. Thinking back...the bread didn't have a chocolate taste. I guess anything brown and found in a bakery would be mistaken as 'chocolate'. Or chocolate was too expensive an ingredient so they skimmed on the chocolate and used less cocoa powder and replaced the rest with powdered milk. Too bad I couldn't find a picture to  tried to find the recipe on Yahoo Taiwan, but it seems like chocolate layer cake and crepes are more popular than my childhood favorite.

Another unfortunate thing is I failed at replicating my childhood memory. It turned out to be...really ugly. I couldn't get the bread to contain its shape when I put them in the oven. So on my second batch, I cut the dough into nine pieces and baked them in a brownie pan. They retained their shape! And they have a softer texture than the ones baked individually.

Was intended on making 'squared' bread

For the recipe, I used the tang zhong dough I shared previously on my blog. Follow the link and follow the recipe until after the first rise. Then follow the recipe below to make the chocolate block.


To make chocolate layers, you will be folding the dough and chocolate block together like you would be doing to make croissants. So what you do first is roll out the bread dough into a rectangle, place the chocolate block in the middle, then take 1/3 of the dough and fold over the chocolate. Take the left side of the dough and fold over to the right. Now it looks like a book--one where you would flip the page from right to left. Rotate the dough 90 degree South, so the book opening is facing you.

Use the rolling pin to flatten the dough, and repeat the folding process.

After giving the dough two folds, you can either cut them up into squares and place them in a brownie pan OR follow this blog for more twistful ideas.

Last bake the bread in the oven for 15-20 minute, and enjoy!

Tuesday, March 27, 2012

Surfas and Soft Pretzels

I took a very spontaneous trip to Surfas at Culver City today. The weather was nice and class was over early, so why not? I've always wanted to go to Surfas, but never let myself go. I know I would walk out broke if I ever make the pilgrimage to culinary mecah. I heard that you can get any spices, any delicates, any tools--whatever you need in a kitchen.

I did not take any photos because I was intimidated by the STRICTLY NO PHOTOGRAPHY sign. Sure enough, when I took my first step into the store, I know I can't possible just get Valrhona's cocoa powder. On display is Whitelily flour; there was corn meal, unbleached bread flour, and unbleached all purpose. So first item that landed in my basket was bread flour. Then I walked to Aisle 10 and saw an entire five tier rack full of cupcake liners--paper, aluminum, and some with patterns, some plain. There goes 500 white cupcake liners in the basket. As I continued my journey, a sales greeted me and asked me if I need assistance. Well...I do want some matcha powder. He was very efficient and guided me to the tea section. Unfortunately, a small 3 oz box cost $40. I guess I can save my matcha adventure when I go to Kyoto.

Anyways at the end I bought more than the cocoa powder I intended to buy, which was not surprising at all. Anyone who loves their kitchen would worship Surfas. If you're ever in Los Angeles or strolling around Culver City, go to Washington Blvd and take a look at Surfas yourself!

Surfas got me so excited to bake! I've been wanting to make soft pretzels for the longest time! And they are soft temptations when I go to Disneyland. One of the many things I bought from Surfas was coarse sea salt. That with the bread flour will certainly gimme the best pretzels, I hope.

Golden pretzel with coarse sea salt
It's such a long recipe, so I'm just going to post the ingredients list and explain the process in words.


First off, take a large bowl and pour warm water and yeast. Wait about 5 minutes for the yeast to wake up.  Then add in the melted butter, follow by whole wheat flour and sea salt. You can use any salt you like for the dough.

If you want to make sweet cinnamon pretzels, then I would add a tablespoon of sugar. I brushed some cinnamon butter mixture after baking and found the pretzel a bit too salty. But the sodium level is just right for a savory pretzel.

After adding whole wheat flour, add a third of the bread flours. Since I like to knead my own bread, I use a wooden spoon and incorporate everything until a dough forms. If you like the no-fuss stand mixer way, then just attach the dough hook and slowly pour the bread flour into the bowl until the dough cleans away from the bowl.

If you are kneading your dough then add enough bread flour until a rough dough forms. On a lightly floured surface, use the ball of your palm to push the top of the dough out, then fold it back and rotate the dough 90 degrees. Push the dough out again with the ball of your palm and fold back. Keep on rotating and pushing and kneading until a smooth surface forms. By this time the dough should barely kiss your hand. Press a finger 1/2 inch into the dough, if the finger impression does not disappear then you're ready to let the dough rest for 40 minutes. I like to keep my dough loosely covered in the oven or the microwave.

After 40 minutes, the dough should have doubled in size. Weigh the dough and divide into 14 balls. With parchment paper ready on the side, roll each ball out into thin strips. It should be longer than your forearm, about the length of a baking sheet. When you first start rolling, roll with the ball of your palm too so you can distribute equal weight on the strip. As the strip gets longer, roll with both palms in the middle and exert a small force to push the dough out. ***Give the sides enough dough to stretch out but keep the dough fat in the middle. Make the tips skinnier than your pinky.

To shape into pretzels, hold the strip from the tip and criss-cross them to make a large loop. Then twist the loop and fold the tips back. Repeat until you get 14 pretzels.

Notice how the tips are skinny and the middle of the loop is fat. The knot is from criss-crossing the tips, twisting the loop, and folding the tips back.
At this stage, preheat oven to 450F.

Now add baking soda to water and boil them together. When the water is ready carefully drop a pretzel into the water. Wait 30 seconds before flipping it and cook for another 30 seconds. Take the cooked pretzel out and let rest on a wire rack. When you get enough to fit on your baking sheet (about 6), brush some egg wash on the pretzels and sprinkle with some coarse sea salt. Then bake for 15 minutes.

Bubbles are coming from the baking soda. Baking soda gives pretzel a tan before baking.

This is a cooked pretzel after boiling.
While the first batch it baking, continue to cook the rest of the pretzels.

If you want sweet pretzels, simply brush the pretzel with egg wash, bake it then brush another layer of cinnamon sugar glaze after you take it out from the oven.

For the sugar glaze I mixed nutmeg, cinnamon, sugar and butter together then brush them on after baking
Wait for the pretzels to cool down a little before you dig in! It's a great idea to have a cheese fondue on the side to dip your salty pretzels in!

Steaming hot pretzels from the oven

Wednesday, February 29, 2012

Making Tang Zhong Bread

So what is tang zhong? It is a water roux that gives the bread a bouncy and soft texture. The role that tang zhong plays in Asian breads is as important as those moldy starters that European breads use. Almost all bakeries in Taiwan, China, Japan, or Korea specialize in soft rather than chewy breads. Tang zhong is very volatile. You can stuff various ingredients in the dough and knead it with nuts, oats, raisins, or red beans...to give it more flavor.

I made several types of bread from tang zhong. Because the dough is volatile, it is very forgiving. I can over pour some milk and cream but still end up with a some tasty Hokkaido milk bread. Another time I overstuffed the dough with red bean and the stuffing was pushed out of the dough during the baking process. No biggy, it was like eating toast with red bean jam at the end! (If they weren't tasty though, I would have dumped them right into the trash can!)


So the first step is to make tang zhong--the star ingredient. All you need is flour and water. The ratio is 1 gram of flour to 5 gram of water. I usually do the following:


50g All Purpose flour
250g drinking water


Mix flour and water in a pot on low heat
Make sure there is no flour lump
Remove pot from heat when you can leave a mark on the roux and the mark won't disappear
Pour the roux into a clean container
Immediately cover the roux with plastic wrap to prevent the top from drying out

Look at the bottom right side of the bowl, you can leave a visible mark that won't disappear right away
A 50:250 ratio is enough to make about 3 loaves of bread. It can be stored in the fridge for up to 4 days.

Use the following recipe to get used to working with tang zhong. It can be sticky to work with at first, but practice makes perfect. Note* I knead my own bread, if you have a stand mixer, the stickiness is not a problem.


Saturday, February 25, 2012

Up and Down Bread Journey

When I planned the content for this first post, I had in mind to make a tang zhong milk bread. It is one recipe that I have tweaked to perfection. However, I couldn't help think how boring my blog would be: picture, words, recipe. There are too many people out there with much higher photography skills. I, on the other hand, doesn't have the patience to decorate the table just to take a few snapshots of my food. Most of the time I just want to devour the thing right away. I'm always hungry in my kitchen.

To offer people more than just pretty pictures, I'm going to dedicate some posts to my baking growth. Take the tang zhong bread, for example, it did not even raise properly. I didn't know there is a difference between active dry yeast and instant yeast. Also my recipe was in Mandarin, so I had no idea I was translating the ingredients wrong. If the instruction says mix the yeast with the rest of the ingredients, then it is instant yeast. Active dry yeast needs a little feeding by bathing them in warm water for 10-15 minutes.

First attempt: failed, used the wrong yeast

If you use the wrong yeast, and the bread fails to raise, your bread would look like the above, and it would be stone hard. Maybe it will be a good pet toy.

When I used the proper yeast, the result was perfect. No wonder people were raving about tang zhong. The texture was velvety, and it lasts about 3 days outside and another week in the fridge. Look at the difference:

Second attempt: great taste, odd shape


These breads were so popular among my friends, I decided to double the recipe and make more bread at once. It takes so long for the dough to proof and re-proof, might as well make a lot and save some time. Doubling the recipe is a great idea, but I forgot that I did not have enough loaf pans for baking. I thought I could pass by doubling each pan...At the end, each loaf raised so high the middle was not baked through. The surface had a perfect glaze, but when I cut through the bread, my knife came out with a layer of gooey dough. So far 2/3 trials ended up in the trash can.

I guess I'm the type of person that looove to challenge myself, and every failure actually motivates me to practice more. Even though on the second try, I got the texture down. I wasn't satisfied with the look. I just can't roll up identical doughs, so one is taller than the other two when the bread comes out from the oven. Furthermore, the folds aren't tugged in tightly, that's why there's a slight gap between the dome and the body of the bread. 

How can I be content with my ugly bread and with a 33.33333% success rate? To fix the look, I looked up some molds that people use for sandwich bread and stumbled across pullman loaf pan. This type of pan has a lid, which keeps your bread from climbing out of shape or over the mold. All your bread would come out with consistent shape. I guess if I ever get tired of rectangular bread, I can always leave the lid on the side.

Pullman loaf pan
the perfect sandwich bread

I was dancing and cheering in my kitchen after I sliced my bread using the pullman loaf pan! The shape was perfect, and the texture was fluffy. This is definitely the climax of my bread making journey. What made me more proud was my dad thought I snapped him a picture of a store-bought bread. His confusion made my dad. I love you dad <3

Well after climax, I experienced a huge emotional drop when my ham flavored sandwich bread came out like this...
I am a deflated, under baked dough

The Canadian bacon slices were too thick so the dough between the bacons was under baked. My roommate commented on how the gooey part tasted like cheese. Any steaming hot goods that came out straight from the oven taste good, but when the bread cooled down, it was a heavy dense piece of shit that tasted like raw flour. 

I was crazily motivated by the last attempt. I tried to calm myself down after the disaster, hung out with some friends and came home all stuffed and happy at one in the morning. I had totally forgot about my ugly bread, but no it was sitting on the counter greeting me when I opened the door. At 1 A.M. I started prepping and kneading. By around one forty I placed the oiled bowl with my dough in the fridge for overnight proofing. Next morning, I chopped 2 slices of bacons into tiny pieces and rolled it up into the dough. 

I gave myself another happy dance around the kitchen when the bread came out of the oven. 

Call me Mr. Bacon Bread (or Toast after I get a tan in the toaster)

Since it was early in the morning, I had all the excuses in the world to devour a fourth of the bread. I realized I made a sandwich bread that is a sandwich itself. All I need is two slices of cheese and two slices of bacon toasts!

So that's my bread journey. The up and down from discovering the difference between active and instant yeast to finding the right pan for that perfect look. Now I've made one successful variation! The goal next time is a walnut raisin bread, maybe with a hint of cinnamon; yes, a cinnamon bun flavored toast. 

Keep on reading for the next post on how to make your own tang zhong bread!