Showing posts with label Desserts. Show all posts

Monday, March 4, 2013

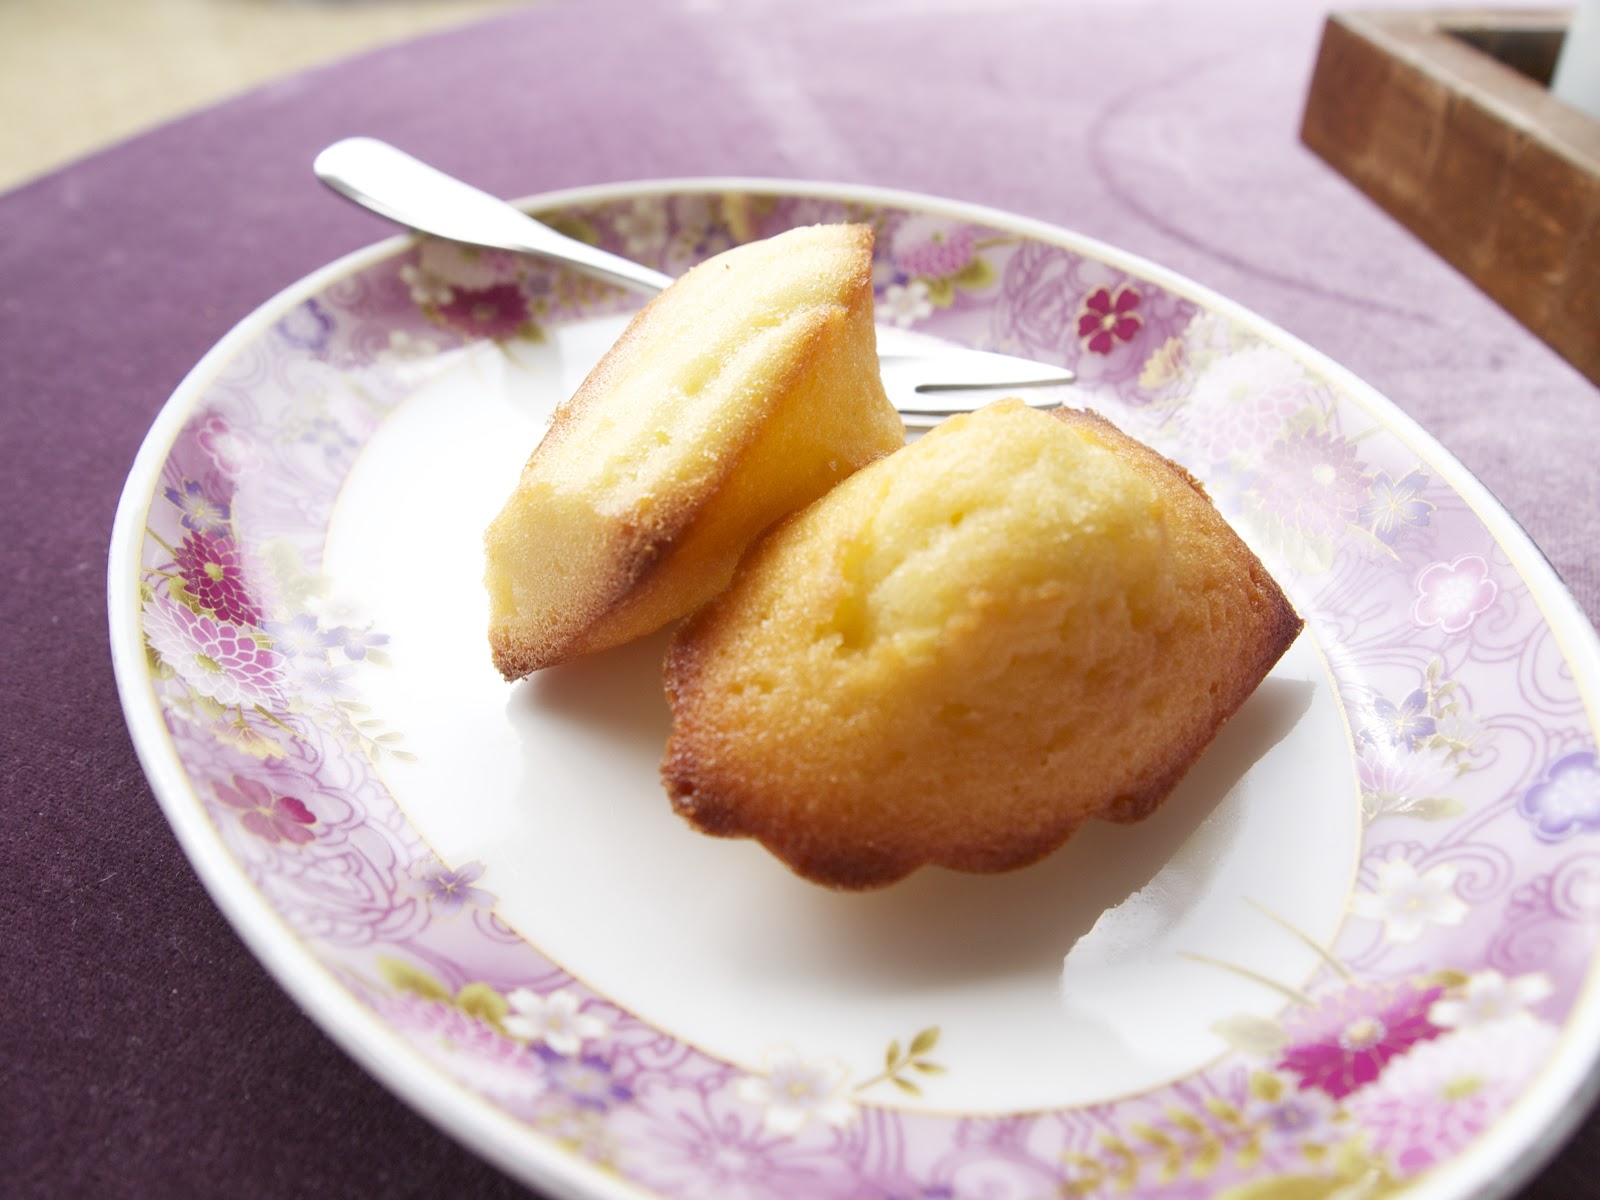
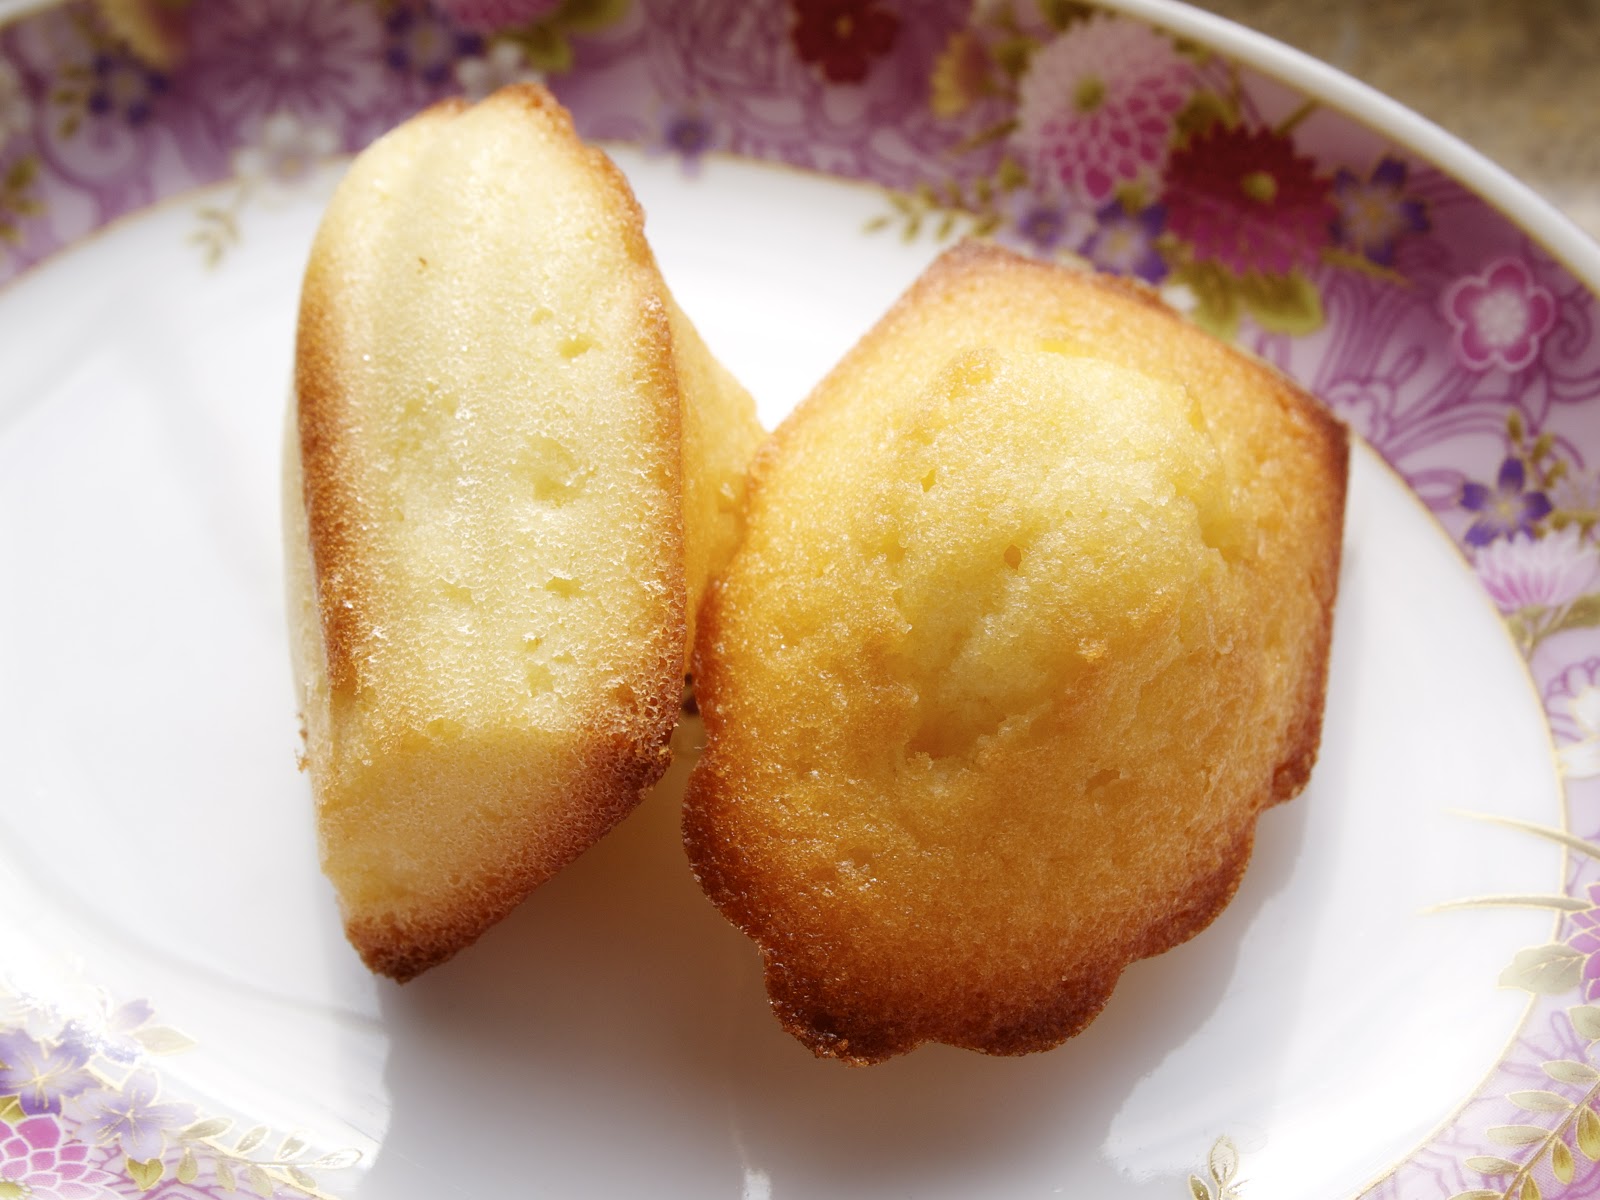
Returning with Lemon Madeleines


Hi Blogger I'm back! And hello there Facebook, Google, Youtube…I love my Astrill VPN. Life behind China's censorship was a tad boring. I couldn't even share comments on my Kindle account. Bummer! 
At least I have my mini oven at home in Shanghai. I can't fit a regular cookie sheet in my oven, and I can't bake more than ten macaron shells at a time. However, it's a good opportunity to cut back on sugar consumption. Moreover, I have a larger audience at home--parents and little brother. No more worries of leftovers!

I hope my VPN doesn't fail me when I'm uploading (knock on wood). I'm more active on Instagram (k00kiemonster) than all other social media because as you would have guesses, it is the only uncensored app. Follow k00kiemonster for instafood moments!

And [Drum Roll] now introducing today's treat--lemon Madeleines


150g unsalted butter
150g cake flour
1 teaspoon baking powder
100g sugar
160g eggs (about 3 medium sized eggs)
2 lemons' peels
1 teaspoon vanilla extract

Melt the butter. Sift flour and baking powder into a large bowl then add the sugar. Beat the eggs in a warm bowl of water till it reaches body temperature. Pour eggs into the dry ingredients, mix well. Add butter in 3 batches. Mix in the vanilla extract and finally the lemon peels. 

If you prefer a more intense lemon flavor, squeeze half a lemon to the batter.

Set bowl in fridge for 3 hours or overnight. When you're ready to bake, preheat the oven to 180-190C. Butter and flour madeleine molds. Fill the molds 80% full. Bake for 17-18 minutes or until golden brown. After baking, remove the cakes right away and let them cool off on a wire rack.

Add a lemon glaze for a store-like look.


A good tip on madeleine molds: choose a mold with distinct shell lines. You don't want a semi-triangle, semi-rectangle cake. If you can't see the indents like a shell, what's the point of making Madeleines? I used a silicone mold that holds eight slots. It was too much hassle to buy individual molds and have them get lost among my cookie cutters and tart molds.

Before I log off, I would like to share a few pics of a lovely stray cat my dad adopted. She's still afraid of me, but I'm sure she won't resist my bowl of warm milk every morning, especially when the temperature is near the low 40s F in Shanghai.


Miao~


Friday, November 16, 2012

Happy Birthday to Julian--Gluten Free Carrot Cake


A big shout out to my friend Julian! He is turning twenty this coming Tuesday. A few years back he was this skinny and snobby boy and now he is twenty, so much less annoying, and more mature. Julian and the rest of the little kids belong to another group during family gatherings. He is the oldest among the kids but not old enough to join the 大姐姐 group. All the older siblings are sisters and most have a younger brother. Naturally the sisters got together, and we let the little kids run around and fight over PSP consoles.

Every year one of those boys is flying oversea for college. Even though they've out grown their tiny frame, to me they will always be a bunch of up-to-no-good boys.

Almond Carrot Cake with Cream Cheese Frosting, Walnuts and Macarons
I adapted Elena's Carrot Cake Cupcake recipe into this two layer birthday cake. I like the simplicity of Elena's recipe...almond meal, baking soda, spices, eggs then BOOM you get a dozen cupcakes! I wonder if the cake would be too dense if I use regular all purpose flour instead of almond meal. However, almond meal never fails to deliver a moist cake. Almond Honey Cake with almond meal and honey is one great example.

Gluten Free Carrot Cake
6 eggs
4 tablespoons vegetable oil
1 cup brown sugar
1/4 cup white sugar
1/4 cup honey
2 teaspoon cinnamon
2 teaspoon ground clove
2 teaspoon ground nutmeg
2 teaspoon ground ginger
1/2 teaspoon salt
4 teaspoon baking soda
3 cups almond meal
1 cup grated carrots
1/2 cup walnut pieces, toasted

2 round 9" baking pans, buttered or lined with parchment paper

In a bowl, mix together the eggs, oil, sugar, honey, spices, and salt. Sift almond meal and baking soda in another bowl. Mix the wet and dry ingredients together till you get a smooth paste. Throw in the grated carrots and walnut pieces.

Divide batter into two equal portions and pour along the side of the pan. *Don't pour everything into the middle, this is how you get a mini volcano during baking.

Bake for 40 minutes at 350F. Let cool in cake pan after baking. Frost right away or wrap in plastic wrap and store in the refrigerator.

Cream cheese frosting: Blend 8oz cream cheese, 4oz unsalted butter, and 2 cups of powdered sugar together till you get a fluffy spread.

Assembly:
Spread cream cheese frosting on top

Frost the second cake

Decorate it with walnuts, macaron shells, or anything you have on hand

Thursday, September 27, 2012

Sharing is Caring--Nami's Green Tea Cookies


One of my favorite blogs is Nami's Just One Cookbook. Nami shares simple Japanese recipes from a simple yet essential dashi stock to unagi don. Every recipe has easy to follow pictures to guide even an amateur in the kitchen. My ungai don was one of Nami's recipes. It literally takes 5 minutes to prepare the unagi sauce, and if you buy pre-charred eel from a Japanese supermarket, dinner can be dinner in no time!

This week I made green tea cookies--one of Nami's desserts. She rarely bakes, but all her baked goods look like they're made from a professional pastry's hands. These cookies were delicious according to my colleagues. They gobbled up every bit and pieces before noon! I love the compliments and bringing back an empty container home. My worst fear is going to a pot-luck and have no one touch the food I bring.

Anyways, Nami's cookie is a fancy version of butter biscuits. It's slightly on the crunchy side, but the cookies melts on your tongue. In the hindsight, you get a faint matcha flavor that balances the rich butter. This is definitely a decadent dessert, meant to be served during high tea or reserved for a special guest.


Nami's Green Tea Cookies

150g/ 2/3cup unsalted butter, room temperature
100g/ 1/2 cup confectioner sugar
2 egg yolks
240g/ 2 1/8 cup all purpose flour
15g/ 2 + 1/4 tablespoon matcha powder
1/2 cup chocolate chips

In a large bowl, cream butter and sugar till butter turns pale. Add egg yolks and mix till well incorporated. Shift flour and matcha powder into butter mixture, mix well. Add chocolate chips and distribute evenly into cookie batter.

Divide batter in half and roll each half into a ball. On a plastic wrap, shape each ball into a log, 2 inch in diameter and 5 inch long. Refrigerate overnight. 15 minutes before baking, preheat oven to 350F and let cookie logs stand in room temperature. Slice cookies into thin slices, about 1/4 inch thick or the width of your pinky. Bake for 15 minutes in the oven. Let cool on the baking sheet for another 15 minutes before placing the cookies on a cooling rack.

I used black chocolate chips while Nami used white chocolate chips. I am a dark chocolate person, but white chocolate looks more graceful in this cookie.


Monday, September 24, 2012

Macaron Tip: Make Buttercream from Egg Yolks


Yes, I am still obsessed over macarons. Today I tried to make teddy bear and flower shaped macarons--big failures. My five pedal flowers came out with various sizes and shapes, and teddy bears all cracked in the middle. Can you imagine a split face teddy bear? It is every kid's worst nightmare, literally.

Among all the shapes I experienced today...I also tried flavoring my macaron shells for the first time! The result was not bad. At first I could barely taste the matcha, but the flavor develops after a couple of hours in the fridge.

I used the French meringue method described in my previous post. Instead of food coloring, I added matcha paste. The paste is made from 1 tablespoon of matcha powder and 1 tablespoon of boiling water. When egg white reaches semi-stiff peak, add the matcha powder in place of food coloring. Then finish whipping the egg white till you reach stiff peak. Or another silly test is turn the bowl upside down. The egg white should not fall. If you end up with a head full of green egg white...well remember to whip your egg white pass whichever state you were on.

To enhance the matcha flavor, I made matcha buttercream to complement the almond shells. This is an easy recipe from I <3 Macarons by Hisako Ogita. Buttercream recipe #2 on this book uses egg yolks instead of egg whites to make the buttercream. What a brilliant idea to use leftover egg yolks! I used to freeze my egg yolks in the fridge, but the temperature seems to cook the yolks in a way that a skin forms around the running egg yolk. Then I give up and just throw my egg yolks away--what a waste!

I normally just use two egg whites in my macarons and they make about two trays of cookies. Two yolks yield just the right amount to fill them up.

Buttercream

100 grams/ 7 tablespoons unsalted butter at room temperature
50ml/ 50g/ 3 1/2 tablespoons milk
2 egg yolks
40g/ 1/4 cup granulated sugar
1 teaspoon matcha powder
2 teaspoon boiled water

In a bowl, whip egg yolks and sugar till the yolks become pale. Heat milk in a saucepan till the side bubbles, remove from heat. While one hand is whipping the egg yolks, pour the hot milk into the eggs with the other hand. Pour everything back into the pot, don't stop whipping to prevent the milk from overheating the eggs. On medium heat, simmer mixture until you can leave a finger trail on the wooden spoon. Remove pot from heat and pour into a bowl. Whip the mixture till you get a custard-like consistency. Leave the mixer on and add 1/3 of butter. Add some more butter when the first batch of butter is incorporated. Mix in all the butter and whip the buttercream till smooth and shiny. Don't worry if the mixture looks grainy after you added in the butter.

Make matcha powder by mixing water and matcha powder together. Add paste into buttercream and whip together till all matcha paste is incorporated.

Buttercream can be stored in the fridge or freezer. Before using, leave out at room temperature till it softens. Or use right away on cupcakes, macarons, cakes...


Tuesday, September 4, 2012

Why are you Swedish? A question that relates to frosting a cupcake.


I just came back from The Tallest Man on Earth--Kristian Matsson's concert. While his music is still hot and steamy in my mind, I need to write down a memorable quote from him. In between songs, he said, people ask him what his favorite color, when he started playing, why he is Swedish (really?), but no one ever ask him how much he practice.

That sentence hit me, hard. No one ask me how much I practice chez ma cuisine. Often times people look up the sky to admire a shooting star, but they don't think about how much time it took the comet to form.

I don't like to blog about failures, even though my very first post was on how I failed to make tang zhong bread. Even though that post captured a series of failed attempt before finally succeeding, they were all written under one post, which eventually showed beautiful white sandwich bread. The macaron post was a similar scenario. Notice how I only post one photo of cracked macaron? There were countless uglier batches that I was too embarrassed to share.

Right now I'm practicing my pipping skills. I have some moist, some crumbly, some velvety cupcake recipes, but my ugly frosting ruin the dessert at the end. Sure it tastes good, but presentation is as important as flavor.

I'm not there yet. Of the twelve cupcakes I made, this is has the most satisfying look from the side. From the top, it looks like a pile of poop on a black cake. Brown on black are not appealing when the frosting is piled up in layers like poop.

Later that day I made more frosting to practice. I wasn't paying too much attention on the recipe, so the frosting was watery. Despite that, I still can't overcome my poop-like shape. I think I am pipping the second layer too much on the inner rim of the first layer. If the second layer is more on top of the first layer and move slightly inward on the third layer, perhaps it would lose the poopie shape.

I will report back when I practice a little more tomorrow. I also bought a closed star tip because part of me blame the French pastry tip! Until then...

Tuesday, August 21, 2012

Simple Treat for a Hot Summer Day--Basil Gelato


After making macarons last week I was left with a dozen egg yolks in the fridge. They were begging me to turn them into ice cream. Can I say no?  It's ice cream we're talking about...velvety sweet thing that cool your tongue when you are sweating like a dog!

This basil gelato recipe comes from Saveur. I clipped it after a visit to Hatfield's. It's rare to find herb flavored ice creams in the grocery store, so the only way I can enjoy my favorite herb other than with tomatoes is to make it myself!

Basil Gelato
adapted from Saveur
yields 1 pint
2 cups basil
2 cups milk
1 cup heavy cream
1/2 cup sugar
4 egg yolks

Put everything into a blender and blend till smooth. Pour into a pot and heat over medium heat until sugar dissolves, 3-5 minutes. Let cool in the fridge over night. Churn in ice cream machine.

If you have a vitamix, simply blend everything for 10 minutes. The motor will give out enough heat to dissolve the sugar. Chill the cream in the fridge over night. Churn in ice cream machine.

Sunday, August 12, 2012

Never Give Up--Macaron filled with Chocolate Ganache

Over the past two weeks, I browsed a handful of popular food blogs for work and personal interest. Some of the blogs have more than fifty comments per post on average. It would make my day to see more than 50 visitors on Chez Ma Cuisine. What is their secret? How do they get people to procrastinate just to wander over some tortuous food photos.

Without doubt, they all have great photos and mostly shot from a DSLR. To me photos are everything. I am a "food gawker", and I make the decision to scroll on or exit the webpage based on quality of the photos. Like many others I am constantly refreshing Pinterest and Tastespotting.

A good photos correlates with quality writing. The more established a blog is, the better the writing. Dorie Greenspan, for example, has a calming yet instructional voice. I read through her posts and I'm craving for more at the end. She has so much to offer. Sometimes it is about the history behind a pastry or a friend she once worked with. 

Good writing read smoothly. I never think Dorie is writing a post. Her words flow out in my mind as if she's talking to me. I think people are most natural when they share their experiences because it is coming from their heart. When you write something close to you, the words aren't forced out of you. They flow out, like silk, like water, like time. 

A good blog is made up of many elements: from good photography to a well written recipe and fluent writing. My goal is to blog what is important to me and write so in a way that will make you know more about me.


Now moving on to sharing my most recent triumph chez ma cuisine. After battling with macarons for a year (yes 365 days), the French almond meringue cookie finally submitted to my electric hand mixer. It was last year around this time that I took a macaron class form Sur La Table. I was impressed by how macarons are made with three ingredients in simple steps but at the same time difficult to perfect. 

One of the many failed attempts
After class I went to practice making macarons. I don't know what I did wrong but either the top cracked or the cookie never had feet. Some people shared a few hints on how to tell what you did wrong, but a cracked cookie can have multiple reasons such as under mixing or overly heated oven. I've tried various recipes and ingredients. I used eggs left out in room temperature for one day, two days, three days, and up to a week. Nothing worked.

All this time I've been using my electric hand mixer. I thought of buying a used stand mixer. But people in the old days don't have kitchen appliances and they still made bread, tarts, and macarons!

I gave up on my maracon project when school started in the Fall of 2011. Recently, I revisited my macaron recipes from Sur La Table and decided to give this stubborn treat another go. I watched more youtube videos and focused more on their techniques. I could tell the difference between a soft peak and stiff peak. And that's the problem of my macarons.

My batter is always watery because I don't whip the egg white long enough. When I fill my pipping bag, the almond mixture just flow out like melted milkshake. Because of the excess moisture, the macarons never dry out at room temperature. Hence lack of feet and hard shell. 

Macarons have three ingredients and three important steps. To bake perfect macarons, each step must be fully executed.

1) Sift almond meals two times to get rid of big lumps. 
  • This will give you a smooth top and texture
  • Macarons are such delicacies that you don't want a grainy texture
2) Beat egg white till stiff peak
  • It doesn't matter how old your egg white is! Just make sure it's at room temperature
  • Start a slower speed
  • Hold off on sugar till you reach a foamy stage--egg white is white and have small air bubbles all over
  • Increase speed to medium after you add the sugar
  • When you notice the whip is leaving marks on the egg white, increase speed to high
  • Continue beating till you get stiff peak that doesn't fold over
  • The beating process can take up to 15 minutes on a hand mixer and a little less than 10 minutes on a stand mixer.
3) Fold almond meal and powder sugar into egg white
  • Use a spatula to fold from bottom to top (incorporating almond meals at the bottom of the bowl to the top)
  • Repeat till almond meal barely disappeared
  • Gently gather batter into a rough ball
  • Insert spatula into the center of the batter and smear out against the bowl clockwise
  • In the opposite direction, gather the batter back into the center
  • Repeat for 5 times, check for consistency
  • You want batter to flow off from your spatula in thick-ribbon like texture and the ribbon keeps its shape for 20 seconds
The recipe I used comes from Syrup and Tang:
Egg white 50g
Almond meal 65g (=1.3 x weight of egg white)
Powder sugar 80g (=1.6 x weight of egg white)
Sugar 40g (=0.8 x weight of egg white)

Read the instruction above
Measure out the ingredients
Line baking sheet with either silpat or parchment paper
Beat egg white
Macronnage
Fill pipping bag with a round tip
Pipe quarter sized rounds on baking sheet (I count to three and move on to pipe another macaron)
Hold baking sheet on both sides, drop on counter top to release air bubbles
Leave to dry out in room temperature for at least 15 minutes and up to 2 hours
Preheat oven to 350F
Bake for 12 minutes
Wait for cookie to cool before removing it from the silpat
Pipe filling on half of the shells, top off with the filling less shells
Wait at least 6 hours before serving.

Friday, July 27, 2012

Traveling Back to Time on Oatmeal Raisin Cookies

Oatmeal raisin cookies reminded me of my grandparents' deli. The store had everything a kid could dream of--cigarette candies, gold coin chocolates, chocolate balls wrapped in soccer ball pattern foil paper. My favorite of all was the peanut butter cookies. They were stored in a large plastic jar and placed high high high on the shelf. Maybe it was the only treat I couldn't reach and the only one thing my grandparents won't give me, the peanut butter cookies were my favorite. I always sat below the cookie jars while I peeled lotus seeds. They gave me motivation, perhaps today is the day when my grandma would award me a piece of cookie.
Chocolate soccer balls

I don't remember if I ever get to try one as a kid. My grandparents never had time to attend to their grandchildren. I only found out later that my grandparents didn't own a deli, they owned the biggest snack wholesale in Southern Taiwan. When I finally tried the cookies, I think I was in second grade already. Can you imagine longing for something throughout your childhood and only to have that wish satisfied years later? What can I say...the longing and the grease made it the best cookie ever. It was so greasy I got shiny lips and finger tips. 

It was the last and only time I had a peanut butter cookie from my grandparents' store. Traditional cookies and candies disappeared slowly in Taiwan. Supermarkets replaced corner delis, and Snicker bars, M&Ms, potato chips filled the shelves. Occasionally I spot some of my childhood candies at hip candies store, but they're much more expensive now. It's funny how the suggested retail price is 10NTD when the store charge you 50NTD.

Replication of a traditional deli at a tourist spot in Taipei

That's my little story about peanut butter cookies. I didn't make peanut butter cookies. It was the idea of making cookies that brought back my memories. What I made last night was oatmeal raisin--thick and chewy. Something about eating cookies make me feel like a kid again. 


What you need to make 2 dozen small cookies or 1 dozen large cookies:

1 stick of unsalted butter, softened
100g brown sugar
1 egg
1/2 teaspoon salt
95g all-purpose flour
1/2 teaspoon baking soda
1/2 teaspoon cinnamon
100g raisin *(I used dried blueberries)
120g old fashioned oatmeal
90g walnut pieces
(recipe adapted from Smitten Kitchen)

In a bowl, cream butter till fluffy, add sugar and beat for another 2 minutes until butter and sugar are incorporated. Alternatively, use your hand and mix the two ingredients together. Add the egg and mix till you get a smooth paste. Add salt, flour, baking soda, and cinnamon. With a spatula incorporate everything until they just come together. Add raisin, oatmeal, and walnut. Make sure they are equally distributed among the batter. Don't over mix. 

Using a 2 tablespoon ice cream scoop (or measure out 28-30g of cookie dough), drop cookies one inch apart on a baking sheet. Refrigerate for 15 minutes. While you're waiting for the cookies to chill, turn on the oven to 350F. After chilling in the fridge, bake for 10-12 minutes or until sides are slightly browned.

For larger cookies, use a 4 tablespoon ice cream scoop or measure out 50-60g of cookie dough.


Wednesday, June 20, 2012

I walk on the sidewalk but I skip on a cobbled path

Oh my does time fly. A year has passed since I took my first baking class at New School of Cooking, and it was Chef May Parich who introduced me to cobblers. I've never heard of this juicy fruit dessert before because Chinese cuisine have more sweet soups than baked goods. Some of the common ingredients the Chinese use are red jujube, red bean, goji berry, and lotus seeds. It's interesting how these ingredients are usually flavorless if you eat them raw and once you cook them they release a hint of sweetness in the soup; on the other hand, fruits lose its acidity after baking. Depends on how you treat the ingredient on hand you get different flavors.

two red ramekins side by side; biscuit is golden yellow with a hint of blueberry juice sipping out on both of themI never baked with blueberries until my biscuit class. The first thing we learned was to crumble butter and flour together into little peas. This is my favorite step in making biscuits, and this is also why I like to make biscuits or pie crusts by hand. I like the silky butter on my finger then rubbing it away with bits of flour.

Contrast to biscuit, in which you need to worry about the dough not raising in the oven, cobblers have no such problem because the main star here is the baked fruit (whatever you decide to slip under the biscuit). I remember baking with apricot and blueberry in class, and I much preferred blueberry's vibrant color after baking. Apricot was a bit boring and stayed rather pale.

a hint of blue juice is visible on the golden biscuit crust in a red ramekinSo yesterday I baked a blueberry cobbler in four ramekins. I had some when it first came out and the hot blueberry juice goes so well with the crunchy biscuit. I admit I over biscuited the cobbler because the biscuit sank down and basically took over the whole ramekin and pushed the blueberries to the side. Nevertheless, butter and blueberry are pretty darn good together! The flavor preserves pretty well because I had a happy breakfast the next day and licked the ramekin clean. As expected though the biscuit lost its crunch texture and the butter flavor isn't as strong, so the cobbler tasted like bread soaked in blueberry jam. It was definitely an appetizing breakfast compare to milk + cereal.

The recipe below makes four servings. You can also bake everything in one square pan to make one serving, and feel free to double the recipe. I cut the original recipe in half and further reduced the sugar level because I want to taste more blueberry.

a list of ingredients and instruction to recreate blueberry cobbler

blueberries in four ramekins ready for biscuit topping

a fork dipping into the cobbler and extracting out a large chunk of biscuit with blueberry juice and blueberries clinging onto the biscuit

Saturday, June 16, 2012

Chocolate Cake Saves the Day

a white puppy playing with a purple disk on the bedI have a little Monster at my apartment for the summer. He likes to play with squeaking toys and one of his favorite is a purple disk. It lets out a wimpy squeak when you press a particular spot. The toy is losing its yarn at the back, and I'm pretty sure it is losing its squeak once all the air leak out. I wish Monster can lose its energy too! He whines like a puppy when I put him back in his cage. Once I let him out, he dashes around the house like he's never been let out before. It's only being a week since my little guest arrived, and already I'm baking a chocolate cake to calm nerve.

When the little one calms down and settles with his toy, it's nice to relax on the couch with a cup of milk and a piece of chocolate cake. It doesn't need frosting because it is rich on its own. The center is dense and moist. The sides crumble apart when I dig in with my fingers. Who need a fork when you have a loaf of steaming cake from the oven? The flavor comes solely from Valrhona's cocoa powder. Best of all you only need one bowl, yes just one.

Two slices of dark chocolate cake lying next to a loaf of chocolate cake
I actually made this chocolate cake twice. On the first loaf I skimped out on sugar, so the body was a tad dry. The dark color made it look moist, but it was just too crumbly on the tongue. I was determined to adapt the recipe, knowing the problem to the first cake. Moreover, Monster was potty trained. I needed to reward myself with the ultimate moist chocolate cake. Adding half a cup more sugar on the second try yielded a much much more satisfying cake. I must thank Debra from Smitten Kitchen for sharing her Everyday Chocolate Cake that cured my craving.

Now that Monster has settled in and I let him crawl at my feet in bed, we are really getting along. I am not losing sleep when he cries and cries in his cage, and I don't need to fret about stepping on wet carpet. It's not bad having a company at the apartment after Evelyn moved out. I like to think it's the magic of chocolate cake. It made everything p-e-r-f-e-c-t.

a list of ingredients and steps to make the chocolate cake


Note on the recipe, if you don't have buttermilk like me, simply squeeze half a lemon into a cup of milk and let the acid react with the milk for five minutes before using! The original recipe called for 325F and 1 hour baking time, but my cake took an hour and twenty minutes at that temperature. So I cranked the temperature up to 350F and checked that the cake was done in forty minutes. Remember to adjust your oven and baking time accordingly.

a slice of chocolate cake is lying face up and you can see air bubbles and texture of the cake

a small loaf of chocolate cake with two slices on the right; one fell and is lying face up


Friday, June 8, 2012

Let's Get Rid of Leftovers

Aged banana really do look ugly, blotchy spots here and there and mushy gooey inside. The sweetness is unbearable. A bite of rotting banana tastes like overly sweetened baby food. Luckily someone came up with banana bread so I can still stock up on some yellow energy food and not feel bad letting it rot to death on the counter.

Besides banana bread, I also like to make vegetable stock and congee because they're leftover friendly. There are always leftover foods in my fridge. Sometimes I get too carried away at Trader Joe's or I simply don't have time to eat at home. Vegetable broth is the fastest way to use up every green, onion, celery stalk in the fridge. It's a good idea to freeze hard vegetables like carrot or celery when you don't think you need it right away. You don't even need to defrost them when you want to make veggie stalk, just let the boiling water to the hard word for you. On the other hand, congee is convenient for using up leftover dinners. What you do is make rice (or use leftover rice), chop up the leftover meals into tiny little pieces, cook everything up with two to three cups of water/broth for 1 hour. This congee tastes the best when you use the greasiest leftover because the broth and plain rice soaks up all the flavor.

Anyhow, this weekend I made banana bread for the two black bananas on my counter. Another goodie I added is LEFTOVER frozen blueberries. I love berries of all kind, but I also get tired of them after a few mouthful, so I dry them all and freeze them in a ziplock bag till I need them. My banana bread really is the end product of all things leftover.

For banana breads, it doesn't matter whether you have one, two or three bad bananas. The more rotting banana you have at home, the more flavor your bread will have. It's also a good time to use up leftover flours, of all kinds. Scrap leftover all-purpose, whole wheat, bread flour into one bag and take it out when you want to make quick breads like banana bread or coffee cake. These recipes are really forgiving. Also if you have leftover nuts, cut them all and spread them onto your batter before baking. Who says you must top banana bread with walnuts?

ingredients and steps to make banana bread

a loaf of banana bread topped with walnut pieces and a few blueberries visible on the top

Saturday, May 26, 2012

Who Knows Cream Cheese, Tangerine Juice and Brownie Mix So Well Together

Sipping a cup of velvety latte is such an indulgence (sighing in bliss). Furthermore, what's not to love about pairing coffee with a small piece of cheese cake.

One bite satisfies cravings for brownie and cheese cake
This is not your ordinary graham-cracker-base cheese cake. Instead, it is half brownie and half New York style cheese cake.

I got the idea from a blog, which I can't relocate despite all the digging in my history drop down list. The whole blog is about recreating boxed desserts. For example, the one I spotted was a three layer biscuit/cake. The bottom was Nestle's ready to bake cookie dough, flattened into the bottom of muffin tins. Next is a layer of store-bought Oreo cookies, pressed lightly into the cookie dough. The last layer is those add your oil and egg and mix-well brownie batter. After 15 minutes in a 350 oven give you a three layered cake with a crunchy crust in the bottom. It's such a party treat, and no one would blame you for serving something out of a box.

As much as I like the creativity part, I wasn't so found of the overly sweet and artificial flavor in boxed desserts. One bite of that devilish creation is essentially a mouthful of chocolate chip cookies, Oreo and brownie. I created my own version of mixed batter dessert, and the result was half brownie and half cheese cake.

Cheese cake with a brownie 'crust'

I was worried that the two batter would settle into one another and producing an ugly marbled cheese cake because both the brownie and cheese cake batter was very runny. In fact, more runny than when I make the full serving of either the brownie or cheese cake. Luckily I made a fortunate mistake. I made the brownie batter first and just let it sit in the bowl on the countertop while I made the other batter. When it came time to fill the muffin tins, the chocolate batter sort of solidified and was on the dense side. The ultimate solution was to pour the denser batter first then the lighter one. I thought the cream cheese batter would be heavier, considering how there was a block of Philadelphia, but with a little tangerine juice and two eggs, the batter had a light chowder consistency.

Nevermind how bad the batters were before baking because when I took the muffin tray from the oven, I was delighted to see a clear separation at the bottom.


A little note on the recipe above, notice how I listed 1 tablespoon of tangerine juice under the cheese cake ingredient list. I was too lazy to squeeze a lemon and zest the fruit, so I just pulled out my citrus juice from the fridge. The cheese cake had a less vibrant citrus flavor to it. Because the tangerine juice is much sweeter than lemon juice, the cheese cake was on the sweet side with a hint of orange. Feel free to use lemonade, orange juice, or simply the classic lemon juice for your batter.


Saturday, May 5, 2012

Classic Eclair with a Vanilla Filling Coated with Dark Chocolate

Creamy desserts like eclair, mousse, parfait aren't my favorite. Sure I wouldn't mind a small glass of dark chocolate mousse, but among other things on a menu, I would rather pick sorbet (if it has to be a soft dessert). I usually skimp out on the whip cream in a hot chocolate and the frosting on a cupcake. I much prefer a naked cupcake--just the crumbly buttery cake alone is enough.

But eclair is my roommate's favorite, to die for, dessert. If tomorrow is the end of the world, she would devour as much eclair as possible and die on a happy stomach. I can already picture her laying on her back with her tummy bulging out, cheeks smeared with chocolate ganache, and holding two more eclairs in her hands.

Freshly glazed eclair on the rack
Eclair isn't hard to make. It takes up a lot of kitchen space and uses up a few pots, bowls, pipping bags, and pipping tips. The Pate a choux takes up one pot, and the pastry cream another. I used a small cast iron frying pan to melt some chocolate for the ganache, so there goes another pot. If you don't have a lot of spare pots like me, then prepare the pate a choux, pastry cream, and ganache separately. 

I would recommend making pastry cream first. When you're ready to assemble your eclair, make the pate a choux. While you're waiting for the cream puff to cool, prepare your pipping bag, tip, and chocolate ganache. That way the cream puff would stay crispy. I stored my pre-filled cream puffs in a ziplock bag and they got a little moist in the fridge. Before filling them I re-heated them in the oven at 350F for 5 minutes. To avoid the trouble of reviving their crispness, just make the pate a choux on the day you want to serve eclairs.

Make your eclairs in the sequence of these recipes:


Recipe 3: For the chocolate ganache, heat 1 cup milk in a saucepan till you get bubbles around the side. On a shallow bowl, place 4 oz of chocolate chunks, pour the hot milk over. Let the chocolate melt for 3 minutes before mixing them together. You should get a thick chocolate sauce. 

What you do first is fill the cream puff with pastry cream. The best pipping tip for this step is a bismarck tip. It leaves a tiny hole on the cream puff. For me I used a small 1/4 in round tip, and I try to find air holes on the cream puff or anywhere i feel it's easy to stick my tip into. I have large holes with creams pipping out. Or you can cut the cream puff in half; almost through but not all the way, so you have a 'lid' to fold over the pastry cream. 

Big holes on the side without a bismarck tip, but just look at the other side :)

After filling the cream puffs, make the chocolate ganache. Either brush or dip each cream puff about half way into the ganache. Let cool on a rack.

This time I took some pictures while I'm making the cream puff. That way before you start making your own puffs and cream, you can visualize the process, and know how the end result should look like.

First off is the cream puff. Picture 1, melt the butter and sugar in water. Heat till the water boils. To the right, mix in your flour all at once. The bottom picture is how your dough should look like. Notice how it's a rough looking bowl and the sides don't stick onto the side.

Here's how my pastry cream looked like before I sieved it. I think my paste was a little too thick. If you overheated your pastry cream, before you pipe your pastry cream, just whisk the cream a little to loosen the stiffness.