Monday, June 25, 2012

Oriental Bread--Man Tou

a man tou is broke down in the middle, and you can see the air holes in the bread

I'm packing away my kitchen this weekend. I can't wait for the day when I can buy a nest I call home and settle for good. But for now, all the spatula, measuring cups, and bowls will have to stay in their cardboard boxes for.

As I packed, I realized I can't update my blog if I leave all my stuff in storage while I crash in my friend's apartment for the time being. This put me in panic mode. Not only do I want to update my blog, I still want to cook and bake too! So I dashed to Google and tried to see what can I possibly learn to make without an oven. Well duh! There's tons of stuff I can make. I don't' know what I was worrying about.
Two white buns side by side

But anyways thanks to my small panic attack because I found a man-tou 饅頭 recipe that I've never thought of making. Man-tou or 饅頭 in Mandarin is a flavorless bun. It's what travelers bring with them on a long distance trip. It lasts a long time before drying up and it's loaded with carbs. Of course nowadays, people create green tea flavor, taro ones and even sweet potato man-tou. It's no longer the plain old bun that you eat when you've got nothing better to fill your empty stomach.

In no time, I got my active dry yeast soaked in warm milk while measuring out some flour and sugar. All the preparation took me about 10 minutes? When I checked on the yeast, no bubbles. Hmm...this never happened, but I'm sure the yeast will get to work once I put everything together. Not so fortunate. I had a very difficult time working with the dough. It was very elastic and the dough barely stretch out. Even after letting it rest for 20 minutes on the counter, it got slightly softer, but still too difficult to knead.

The next day I started all over again with new yeast and even got a better version of the recipe. It seems like the traditional way is to make two doughs--one old and one young, then mix the two together to get the right chewiness. Like the first day I saw no bubbles when I soak the yeast in warm water. But as I recall, I used a little more than 1 cup of water but only 1/2 teaspoon of yeast. Maybe the proportion of water is too much for the yeast to bubble up?

All I can say is. It worked, this time.
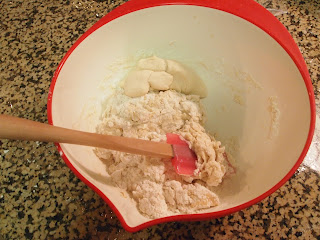
an old dough is to be kneaded into a bowl of flours
the dough on the top of the messy dough is the old dough
So what's the old and young dough I was talking about? Some Western bakeries keep a moldy little dough in their fridge, which is the key to their fragrant breads. Apparently in China, traditional man-tou makers also keep smelly doughs! Except theirs isn't moldy and they don't pass it on from generation to generation. The old dough is simply an over raised dough kept in a cold place for up to 3 months. Every time you want to make man-tou you snatch a chunk from the old dough and knead it into new flour. Whatever dough you don't use up, add it back to the old dough for next time you make man-tou. Similarly, the old dough gives man-tou a sour flavor, and it balances out with sugar to give you a light tang when you take a bite.

Another interesting thing about this recipe before I give you the recipe is that it uses cake flour! Yes, you heard me right, cake flour in bread! It gave me the right chew that I remember from childhood, when grandma used to walk a few kilometers to the market to buy me fresh buns before I drag my lazy ass off the bamboo mat.

You begin with a not so old old dough:
50g cake flour
150g all-purpose flour
1/2 teaspoon active dry yeast
110g warm water
a sprinkle of salt

let yeast soak in warm water for 10 minutes
a hand is kneading the dough; the force comes from the palm of the handmeasure out the flours in a large bowl and sprinkle some salt on top
pour water and yeast over flour
gather everything into a rough ball
start kneading with the back of your palm
push the dough away, then fold it back
turn the bowl a quarter to the right/left (whichever direction you prefer)
continue to knead, fold, and turn the bowl till you get a smooth surface
the bowl at this time should be free of flour and water
cover dough with wet clothe or plastic wrap and let rest for 3-4 hours
**you can also refrigerate the dough at this time and continue the next day

main dough:
150g all-purpose flour
200g cake flour
5g active dry yeast
200g milk
40g sugar
1/8 teaspoon baking soda
15g or 1 tablespoon unsalted butter, at room temperature
100g old dough

pour yeast into milk
measure out the dry ingredients into one large bowl
if butter is not at room temperature, heat it up for 5-10 seconds in the microwave
pour milk and yeast into the bowl of dry ingredients
when the ingredients are roughly incorporated, knead in the old dough
when you get a rough ball, add the butter
knead the butter into the dough, folding un-buttered sides onto the buttered side
knead with the back of your palm, fold over the dough, and turn the bowl a quarter to the right
continue until you get a very smooth surface and the dough is soft to push
take a small piece of dough and flatten it between your palms, then try to open it up between your fingers
a rolling pin and a scraper are on top of a thick dough roughcontinue kneading if the dough is too thick to stretch out; if you get a thin membrane then stop kneading
cover the dough with wet clothe or plastic wrap and let rest for 20 minutes
after twenty minutes, roll the dough out into a rectangle (length longer than width)
now we will roll the dough by first tugging the bottom up into a tight rope, then with your palms, roll the dough forward
you should get a long rope
if the rope isn't even in width, roll the dough back and forth stretching out
cut the rope up into 2" pieces
let pre-cooked man-tou rest for 40 minutes before steaming

When steaming, place a sheet of baking paper on top of the metal plate, then assemble the man-tou so that they have enough space between them to rise. Cook boiler on medium heat for 12 minutes. After steaming, turn off the fire and let the pot rest for 5 minutes before opening the lid to remove the man-tous.

three buns are placed in a rice cooker and they are not touching each other so their skin won't stick after steaming

A red electric rice cooker
I used TaTung Electric Cooker

Repeat with the remaining man-tou. They keep well in room temperature. You can reheat them with steam or in microwave. It's good for breakfast with a side of scramble egg!
scrambled egg with fish paste and onion inside a bun

Wednesday, June 20, 2012

I walk on the sidewalk but I skip on a cobbled path

Oh my does time fly. A year has passed since I took my first baking class at New School of Cooking, and it was Chef May Parich who introduced me to cobblers. I've never heard of this juicy fruit dessert before because Chinese cuisine have more sweet soups than baked goods. Some of the common ingredients the Chinese use are red jujube, red bean, goji berry, and lotus seeds. It's interesting how these ingredients are usually flavorless if you eat them raw and once you cook them they release a hint of sweetness in the soup; on the other hand, fruits lose its acidity after baking. Depends on how you treat the ingredient on hand you get different flavors.

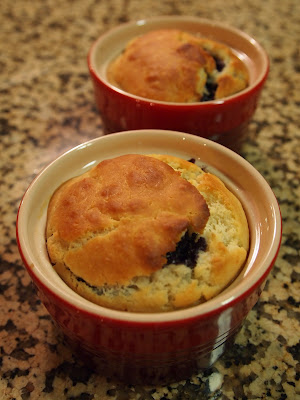
two red ramekins side by side; biscuit is golden yellow with a hint of blueberry juice sipping out on both of themI never baked with blueberries until my biscuit class. The first thing we learned was to crumble butter and flour together into little peas. This is my favorite step in making biscuits, and this is also why I like to make biscuits or pie crusts by hand. I like the silky butter on my finger then rubbing it away with bits of flour.

Contrast to biscuit, in which you need to worry about the dough not raising in the oven, cobblers have no such problem because the main star here is the baked fruit (whatever you decide to slip under the biscuit). I remember baking with apricot and blueberry in class, and I much preferred blueberry's vibrant color after baking. Apricot was a bit boring and stayed rather pale.

a hint of blue juice is visible on the golden biscuit crust in a red ramekinSo yesterday I baked a blueberry cobbler in four ramekins. I had some when it first came out and the hot blueberry juice goes so well with the crunchy biscuit. I admit I over biscuited the cobbler because the biscuit sank down and basically took over the whole ramekin and pushed the blueberries to the side. Nevertheless, butter and blueberry are pretty darn good together! The flavor preserves pretty well because I had a happy breakfast the next day and licked the ramekin clean. As expected though the biscuit lost its crunch texture and the butter flavor isn't as strong, so the cobbler tasted like bread soaked in blueberry jam. It was definitely an appetizing breakfast compare to milk + cereal.

The recipe below makes four servings. You can also bake everything in one square pan to make one serving, and feel free to double the recipe. I cut the original recipe in half and further reduced the sugar level because I want to taste more blueberry.

a list of ingredients and instruction to recreate blueberry cobbler

blueberries in four ramekins ready for biscuit topping

a fork dipping into the cobbler and extracting out a large chunk of biscuit with blueberry juice and blueberries clinging onto the biscuit

Saturday, June 16, 2012

Chocolate Cake Saves the Day

a white puppy playing with a purple disk on the bedI have a little Monster at my apartment for the summer. He likes to play with squeaking toys and one of his favorite is a purple disk. It lets out a wimpy squeak when you press a particular spot. The toy is losing its yarn at the back, and I'm pretty sure it is losing its squeak once all the air leak out. I wish Monster can lose its energy too! He whines like a puppy when I put him back in his cage. Once I let him out, he dashes around the house like he's never been let out before. It's only being a week since my little guest arrived, and already I'm baking a chocolate cake to calm nerve.

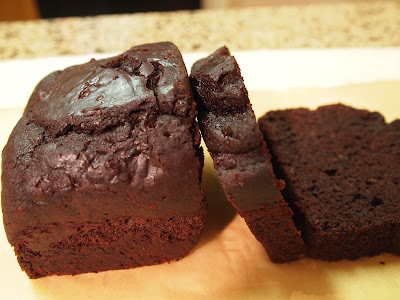
When the little one calms down and settles with his toy, it's nice to relax on the couch with a cup of milk and a piece of chocolate cake. It doesn't need frosting because it is rich on its own. The center is dense and moist. The sides crumble apart when I dig in with my fingers. Who need a fork when you have a loaf of steaming cake from the oven? The flavor comes solely from Valrhona's cocoa powder. Best of all you only need one bowl, yes just one.

Two slices of dark chocolate cake lying next to a loaf of chocolate cake
I actually made this chocolate cake twice. On the first loaf I skimped out on sugar, so the body was a tad dry. The dark color made it look moist, but it was just too crumbly on the tongue. I was determined to adapt the recipe, knowing the problem to the first cake. Moreover, Monster was potty trained. I needed to reward myself with the ultimate moist chocolate cake. Adding half a cup more sugar on the second try yielded a much much more satisfying cake. I must thank Debra from Smitten Kitchen for sharing her Everyday Chocolate Cake that cured my craving.

Now that Monster has settled in and I let him crawl at my feet in bed, we are really getting along. I am not losing sleep when he cries and cries in his cage, and I don't need to fret about stepping on wet carpet. It's not bad having a company at the apartment after Evelyn moved out. I like to think it's the magic of chocolate cake. It made everything p-e-r-f-e-c-t.

a list of ingredients and steps to make the chocolate cake


Note on the recipe, if you don't have buttermilk like me, simply squeeze half a lemon into a cup of milk and let the acid react with the milk for five minutes before using! The original recipe called for 325F and 1 hour baking time, but my cake took an hour and twenty minutes at that temperature. So I cranked the temperature up to 350F and checked that the cake was done in forty minutes. Remember to adjust your oven and baking time accordingly.

a slice of chocolate cake is lying face up and you can see air bubbles and texture of the cake

a small loaf of chocolate cake with two slices on the right; one fell and is lying face up


Monday, June 11, 2012

Goodbye Dinner at Hatfield's Restaurant

The Summer after graduation is a joyous yet tearful season. This year I'm my saying good bye to my closest friend and roommate. I had horrible experiences living with other people. The noise, the drinking, and the fight over AC in dormitory were bearable. Then it got worse. Texts and sticky notes in the middle of the night from my roommate telling me to clean up the dishes. No friends over the apartment policy. No talking in the living room at night. I was jealous of people who became sisters with their roommates. I was Cinder-Angel waiting for my fairy godmother.

Desperate to find a roommate before everyone leave for the summer, my fairy godmother sent Evelyn to me. Everything was promptly decided between us. The next thing I know we were shopping for furniture at IKEA.

We made a sofa bed from a full sized bed and added a colorful sheet from the kid's section along with five big pillows as cushion. Our sofa cost less than either a regular sofa bed or a sofa set. Better yet there's no hassle to clear the living room and open the bed when friends visit. Although it wasn't the most comfortable sofa, we enjoyed some One Piece and a lot of snacking in the living room. I'm going to miss her very very much.


For our goodbye dinner we went to Hatfield's on Melrose. It was rated by Bon Appetit as one of the 10 Best New Restaurants in America, and it has one Michelin Star. The menu is crafted by Quinn Hatfield and it changes seasonally. Hatfield's is a gem in both savory and dessert. While husband Quinn manages the kitchen, wife Karen runs the front of the house and the dessert. I always recommend my friends to save a large space for dessert.

With our petite stomaches neither of us ordered the seasonal prix fixe. The set menu is a four course meal including a dessert of your choice for $63. Currently, you can choose between kanpachi and scallop, prawn and halibut,  or duck breast and beef rib. As for the vegetarian set, expect strawberry salad, cannellini bean flan, and grilled cauliflower for $53. There's only one set for herbivores, but don't be disappointed because these three vegetarian dishes are the best you can find in Los Angeles.

Starting off with Evelyn and I's appetizers, we both ordered Bobo Farms Foie Gras since it's the last month in LA to order foie gras. The serving was quite large for an appetizer. It was served with a apple-rosemary sauce on top of two caramelized cippolini and a side of citrus cucumber to balance the goose fat.

apple-rosemary butter, caramelized cippolini onion, seared foie gras, and a side of citrus cucumber accompanied by a molasse toast
Bobo Farms Foie Gras

Moving on to the entrees. One of my favorite dish at Hatfield's on the menu right now is the Thirty-Six Hour Slow Cooked Beef Rib. Let me tell you it does not chew like meat in your mouth. I jumped from my seat when I took the first bite. The meat melted in my mouth as if I'm eating jell-o. Perhaps I was too surprised by the texture to savor the flavor. I wish the flavor can be more pungent. The best about beef rib is that heavy concentrate of spices, beef, and wine.

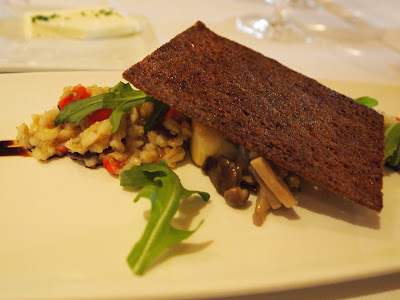
For a lighter option, I would go for the cannelloni bean flan that's shaped and plated like a silky Japanese tofu. I forgot which entree I ordered, mainly just one of the dish from the vegetarian menu. So I expected a custard made from vegetable purees and eggs when I lifted the molasses toast up. What the flan actually taste like was a silky mash potato without the butter. The flan actually had very little flavor. What elevates the dish is the mushroom ragout on the top. The ragout had a thick sauce that barely covers the flan, and it sinks deep down, clinging onto the mash cannellini.

cannellini bean mashed and shaped into a rectangle topped with molasses toast
Warm Cannellini Bean Flan
mushroom with a dark sauce that accompanies the cannellini flan
Mushroom Ragout

Evelyn, on the other hand, had Croque Madame for entree. It's one of the praised dishes at Hatfield, but we both agreed that it was too greasy. The toast was crunchy when you first bite into it, then the oil oozes out and stays on your tongue. Evelyn decomposed the sandwich and ate it open-face style.

One last thing about the food before we move into dessert. The table bread tastes like it came out straight from the oven. It was a delight to enjoy as we wait for our appetizers.

When it came time to choose a dessert, we chose strawberry napoleon and three flavors of gelato and sorbet. The napoleon had two layer each with a dash of fresh cream and strawberry pieces. On the side is a pistachio brittle gelato. I love love love pistachio gelato so I got an extra scoop of pistachio brittle along with strawberry and lemon ginger sorbet. The sorbets are light and fresh, definitely not from extracts.


The other time I visited Hatfield's, I enjoyed Karen's Sugar and Spice Beignets very much. Two round pillow-like doughnuts were served between a chocolate fondue and a vanilla-date milkshake. Even though the beignets looked like any other sugar-dusted doughnuts, the cinnamon kicked the flavor up, so it's not what you would expect from your 24-7 deli. Moreover, it was not a overwhelmingly sweet dessert because the bitterness from the fondue and the spice from the cinnamon matches the sugar coat on the beignets. You just want to savor each little bite.

beignets served between venezuelan chocolate fondue and a shot class filled with vanilla-date milkshake
Sugar & Spice Beignets
Hatfield's never disappoint when you want to spend some quality time with friends or families. The restaurant has an exciting ambiance during peak hours, but it never gets out of control like Bottega Louie. Also securing a reservation is not a problem at all. Before Hatfield's stop serving foie gras at the end of June, stop by Hatfield's on Melrose. 

Saturday, June 9, 2012

Borrowing Recipes from the 16th Century

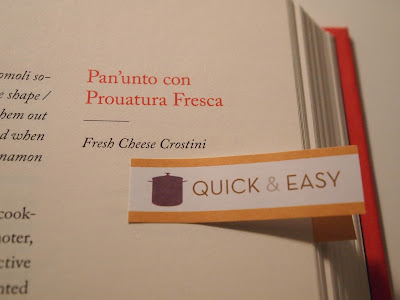
recipe title in red and english translation at the bottom

Grilled cheese isn't a contemporary goodie. It goes way back in history. I was reading Anne Willan's The Cookbook Library and came across a 16th century recipe--Pan'unto con Prouatura Fresca or Fresh Cheese Crostini. According to the translation on the book, Pan'unto means greasy bread in Italian. Although the original creator of this recipe, Domenico Romoli, didn't instruct the us to grill a thick slice of cheese between two buttered breads, he did said "fry [the slices of bread in the shape/ of kidneys] in butter, turning them once". Anne Willan's instruction to her modified version calls for 3 tablespoons of melted butter and fry the breads till all fatty goodness is absorbed then broil everything till you get a crostini. Ultimately you're making a open face sandwich, good for appetizer or brunch. Anne called for a side of fresh figs to go along this crostini.

I thought why not make fresh cheese sandwich instead of a crostini?

What I did differently than both Anne and Domenico is I glued two pieces of bread together with melted cheese and cinnamon sugar. Also instead of buttering the bread then frying the bread in butter, I reduced the amount of butter to just a thin layer on each of the sandwich. Then I bake my sandwich with butter on each side till the crust get crispy.

If you're thinking how can mozzarella--a cheese, go well with cinnamon? I was a little surprised too when I read the ingredient list. To me cheese is always part of a savory dish and cinnamon sugar on the other hand belongs to hot buns and doughnuts. Combining the two together? hmm...kind of weird. I guess it's like how bacon and chocolate go so well together. I'm glad I tried this recipe because it's easy and takes no time to prepare. If you have stale bread, make some cheesy cinnamon crostinis.

a layer of cinnamon sugar on top of melted mozzarella after the bread and the cheese came out from the oven
Melted mozzarella with a layer of cinnamon sugar
nothing is better than melted cheese
The recipe below is my healthier version of grilled cheese. If you want a weekend treat, then go for the grill and the butter. Adjust the amount of mozzarella according to your preference. The more you put the fatter your sandwich and the more pleasure. I also recommend provolone, less smelly cheese to go with cinnamon, but I'm thinking maybe gorgonzola and cinnamon might be surprisingly good too! Who knows?

ingredients and steps for making your own mozzarella cinnamon sandwich

cinnamon goes well with mocha!

Friday, June 8, 2012

Let's Get Rid of Leftovers

Aged banana really do look ugly, blotchy spots here and there and mushy gooey inside. The sweetness is unbearable. A bite of rotting banana tastes like overly sweetened baby food. Luckily someone came up with banana bread so I can still stock up on some yellow energy food and not feel bad letting it rot to death on the counter.

Besides banana bread, I also like to make vegetable stock and congee because they're leftover friendly. There are always leftover foods in my fridge. Sometimes I get too carried away at Trader Joe's or I simply don't have time to eat at home. Vegetable broth is the fastest way to use up every green, onion, celery stalk in the fridge. It's a good idea to freeze hard vegetables like carrot or celery when you don't think you need it right away. You don't even need to defrost them when you want to make veggie stalk, just let the boiling water to the hard word for you. On the other hand, congee is convenient for using up leftover dinners. What you do is make rice (or use leftover rice), chop up the leftover meals into tiny little pieces, cook everything up with two to three cups of water/broth for 1 hour. This congee tastes the best when you use the greasiest leftover because the broth and plain rice soaks up all the flavor.

Anyhow, this weekend I made banana bread for the two black bananas on my counter. Another goodie I added is LEFTOVER frozen blueberries. I love berries of all kind, but I also get tired of them after a few mouthful, so I dry them all and freeze them in a ziplock bag till I need them. My banana bread really is the end product of all things leftover.

For banana breads, it doesn't matter whether you have one, two or three bad bananas. The more rotting banana you have at home, the more flavor your bread will have. It's also a good time to use up leftover flours, of all kinds. Scrap leftover all-purpose, whole wheat, bread flour into one bag and take it out when you want to make quick breads like banana bread or coffee cake. These recipes are really forgiving. Also if you have leftover nuts, cut them all and spread them onto your batter before baking. Who says you must top banana bread with walnuts?

ingredients and steps to make banana bread

a loaf of banana bread topped with walnut pieces and a few blueberries visible on the top

Friday, June 1, 2012

Peter Reinhart's Bagel Recipe--My Last Batch of Homemade Bagels

Not everything is better homemade. Bagel, is an example. After trying out a one day bagel recipe, I went for Peter Reinhart's bagel recipe, which I read from Smitten Kitchen. The second recipe definitely taste better than the first because of the honey and additional time for flavor to develop. However, it's such a tedious process, and I still didn't find the NewYork flavor in my homemade bagel.

When my bagels first came out from the oven, it had a harder crust and a chewy body. Something is lacking here. Something flavorful. Maybe it's the water? I've heard how some bagel shops in LA boast that they import water from New York just for their bagels. Does it taste better?

Anyhow, the homemade bagels lost its crust the next morning. The interior lost its bouncy-ness. What replaced it was a leather shoe sole texture. Bummer. I took two days for those babies to marinate in the fridge, and they won't give me a longer shelf life. Since Ii is impossible for me to finish 10 bagels or a batch of bagels in one day, I'm calling an end to my bagel journey.

Bagels, you will be my lazy breakfast when I'm late for class. On second thought, I'm never going back to school, so scratch that! Bagels, you will be my craving till I visit New York again! Or when I take my lazy bum to Beverly Hills for one of those made-with-water-imported-from-NYC bagels.

a plain bagel slice in half and stuffed with cream cheese and smoked salmon
Homemade bagel with salmon and cream cheese
Even though I've had enough of bagel making (after two tries), you should still try them at home. Maybe you will like your homemade flavor more than the store-bought ones. Some bakeries may claim that they use the best ingredients, but you can't get that commercial taste out of your food from time to time. I believe in trying everything before giving up. If you never try, how would you know that it isn't for you?

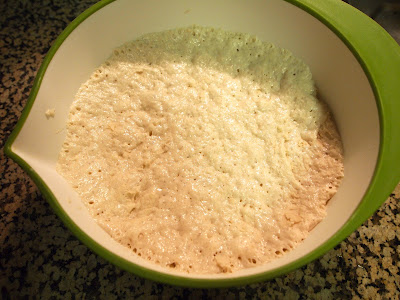
First off get the recipe from Smitten Kitchen by clicking on the hyperlink provide above. The first thing the recipe calls for is a sponge. You mix your yeast with flour to get porous batter like below.

the dough has visible holes all over, very sticky, and gooey looking
bagel sponge
Then you add rest of the flour into the sponge and knead everything into a hard and stubborn dough. It will be more difficult to knead than a tang zhong dough. Even though the recipe said it will take you 15 minute to knead, it took me 40 minutes for the dough to pass the window-pane test. When you feel the dough is smooth on the outside, snitch a little piece off, press it down against the counter, then hold between your middle and index fingers in both hands, stretch the dough out. The dough is ready to shape once a thin layer of dough is visible when you stretch it out. If the dough rips before you see a thin film, then continue kneading till you get the right consistency.

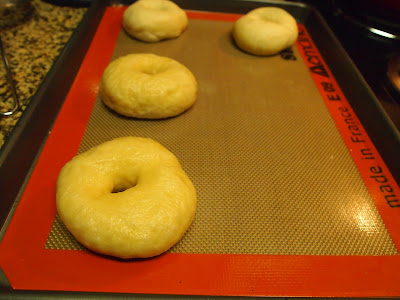
Afterwards, divide the dough into 100g pieces. This will make small to medium sized bagels. For larger ones, similar to the size you find at coffee shops, divide dough into 120g pieces. Next roll each one into a ball. Press both of your thumbs into the middle of the dough, don't be too eager to poke a hole though it. Rotate the dough between your hands with your thumbs pressing lightly into the middle. This way you'll stretch the middle out evenly. When you feel like you got a shallow dip in the middle, poke a thumb through. Now put both of your thumbs into the hole and stretch it out while rotating the dough between your hands. It's easy to put your index finger through and spin the bagel to get a close to perfect circle in the middle.

bagels are shaped and laid out on a baking sheet while you shape the rest of the doughs
weight, roll, then shape
When you shaped all your bagels, cover them in light cloth or plastic wrap. Place the tray in fridge for up to two days.

When you're ready to bake them, preheat the oven and get a pot of boiling water. Next boil the bagel for one to two minutes on each side.

give the raw bagel a bath before baking it
fresh mini bagel from the oven

a light golden crust forms right out from the oven
I hope you enjoy your bagel journey!